You might not realize you have a problem with your RV air conditioner until temps rise and you discover an issue with your unit when you need to use it.
Key Takeaways
- RV air conditioners need 12-volt DC controls and 120-volt AC power, or they act dead fast.
- Warm ceiling vent air often comes from tiny duct leaks, HVAC foil tape seals gaps and fixes mixing.
- Fastest way to cool an RV is air dump mode, close registers so cold air drops down.
From not pulling power to not cooling down to tripping a breaker, there are a few common problems that go along with RV air conditioners. But with a better understanding of how your RV air conditioner operates, there are several simple troubleshooting solutions to remedy these issues and ways to maximize your appliance’s efficiency.

Let’s take a look at a few common problems and troubleshooting solutions for your RV air conditioner.
Further reading...


RV AC Won’t Turn on: AC Shore Power and 12-Volt Battery Checks
An RV air conditioner uses two different types of power to operate. The thermostat and other controls operate on your 12-volt direct current (DC) battery. The RV A/C unit (fan and compressor) runs on 120-volt alternating current (AC) via shore power. If either of these is missing or improper, you’ll have problems with the operation.
Check 12-Volt Battery Voltage, Connections, and Corrosion
Check battery voltage and other related issues like loose battery connections or corrosion.
Avoid Overload on 30amp vs. 50-amp Shore Power
You’ll want to make sure that you’re not operating outside of your RV’s power capabilities. Depending on your RV’s amperage (either 30 or 50 amp) you’ll have 3,600 watts or 12,000 watts of power, respectively, available for use. An RV air conditioner can consume upwards of 2,400 watts on start-up and then level out to around 1,500 watts as it continues to run. RVers can quickly exceed the available wattage by operating other appliances, like a microwave, electric water heater element, or refrigerator at the same time. Try turning one of the other appliances off and test the air conditioner again.
Low voltage can cause an increase in amperage running through the air conditioner, which in turn causes the breaker to trip in the electrical panel. If you have a display panel inside your RV or an EMS (electrical management system) that shows an exact voltage reading coming into the RV, make sure that it’s in the proper operating range as recommended by the air conditioner manufacturer. If you know how to use a multimeter, you can use one to get this voltage reading at the campground pedestal—the multimeter should be set to “Volts AC.”
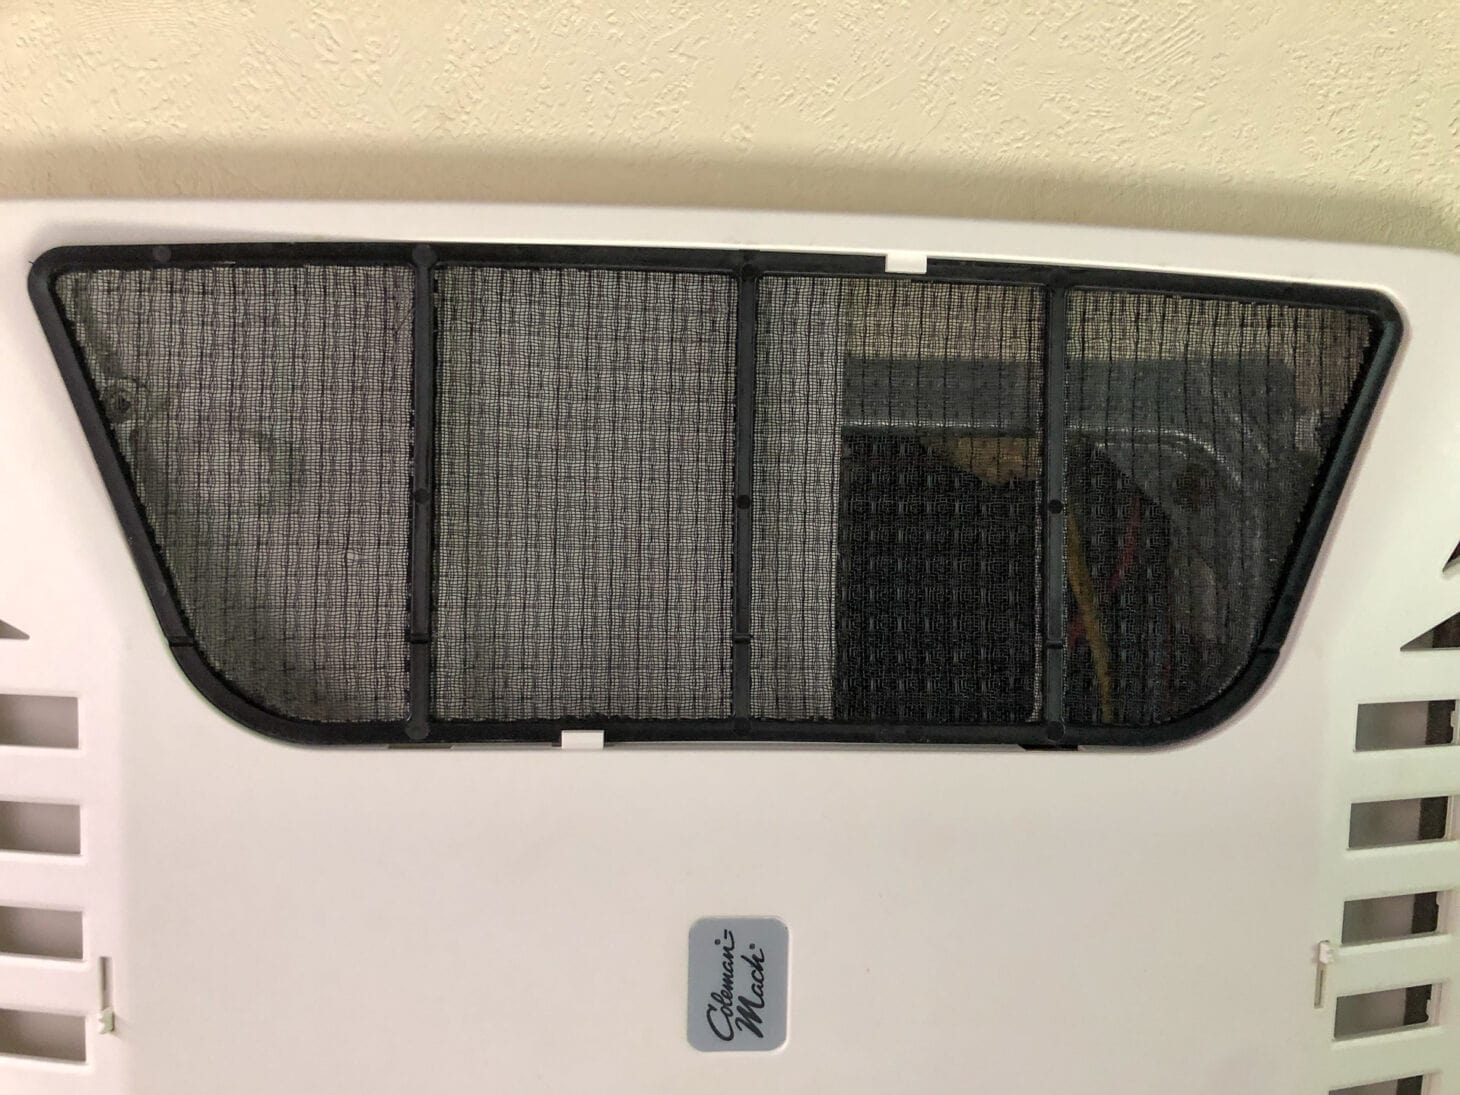

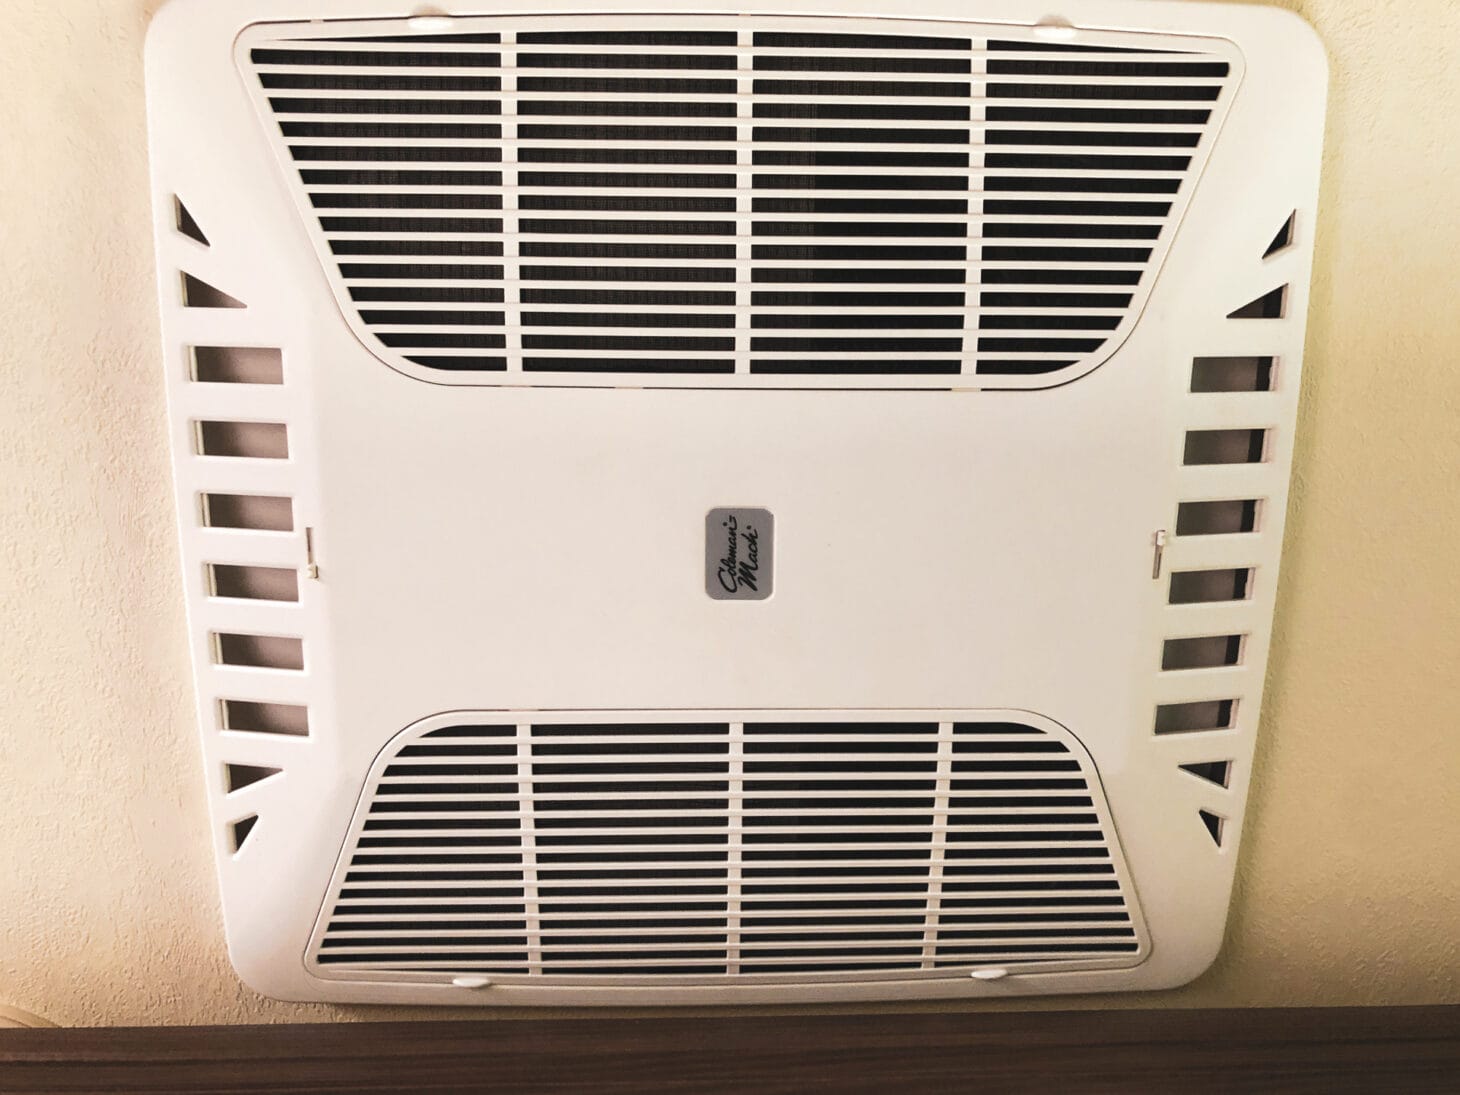
RV AC Blowing Warm Air From Ceiling Vents: Leaks, Filters, and Airflow
Why Warm Attic Air Mixes With Cool Air
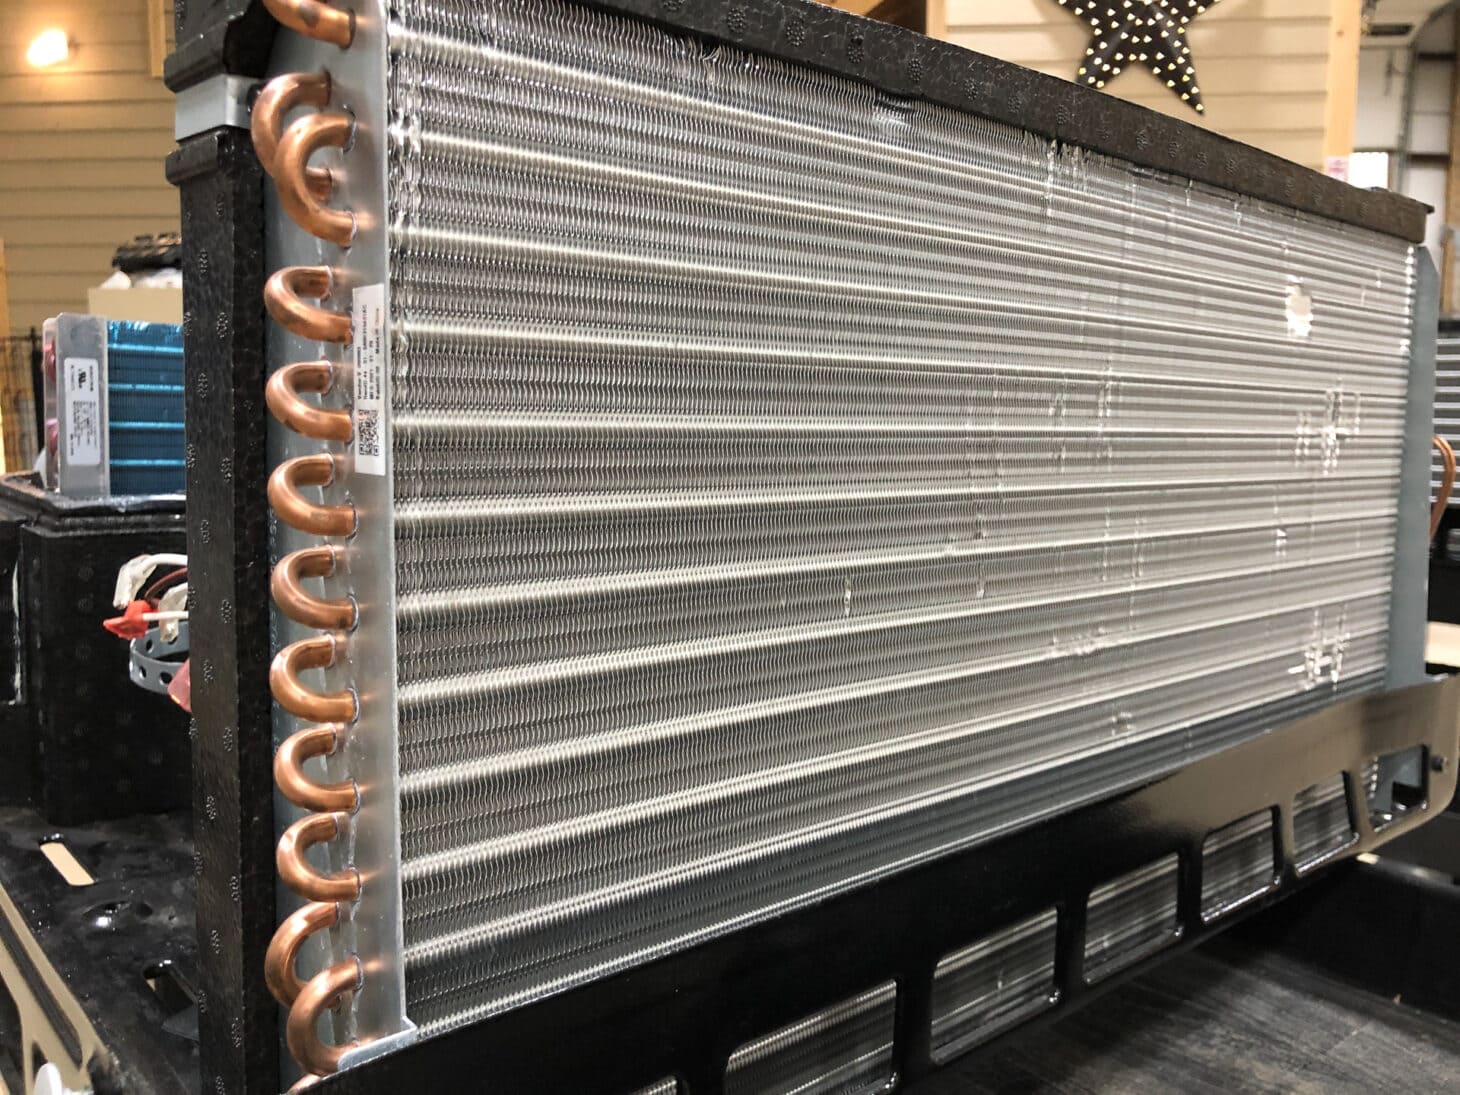
Warm air from either the RV attic or the “return” air vent can mingle with cool air via leaks or gaps at areas in your RV, like the plenum or dam area. Airflow issues like frozen evaporator coils, dirty coils, dirty air filters, and improper fan speed can also cause warm air to come out of the ceiling vents.
Prevent Frozen Evaporator Coils With High Fan Speed
Periodically inspect the plenum or dam area of your RV by removing the overhead ceiling cover where the return air filter and/or controls are located. Use HVAC foil tape to seal off problem areas where the cool air supply might be mixing with warm air. Even the smallest holes can create problems. Or, call an RV technician to inspect all of the possible locations for leaks and gaps throughout the ductwork.
Keep the fan speed set on high so that air moves properly across the evaporator coils and prevents them from icing over. Also, check, clean, and replace the return air filter as needed when in use.
RV AC Short Cycling: Humidity, Frozen Coils and Airflow
Your RV A/C unit might run properly but cycles on and off, also known as short cycling. Here’s one possible cause:
High Humidity Can Freeze Coils and Stop Airflow
High humidity can cause the evaporator coils to freeze and impede airflow. Invest in a dehumidifier to use inside of your RV to assist with removing excess moisture in the air.
Use Air Dump for Maximum Airflow, Skip Tight Registers
If your overhead interior panel includes the air dump feature, keep it open instead of using ductwork or individual registers to regulate the temperature inside the RV. Keeping your unit working properly is all about maximum airflow.
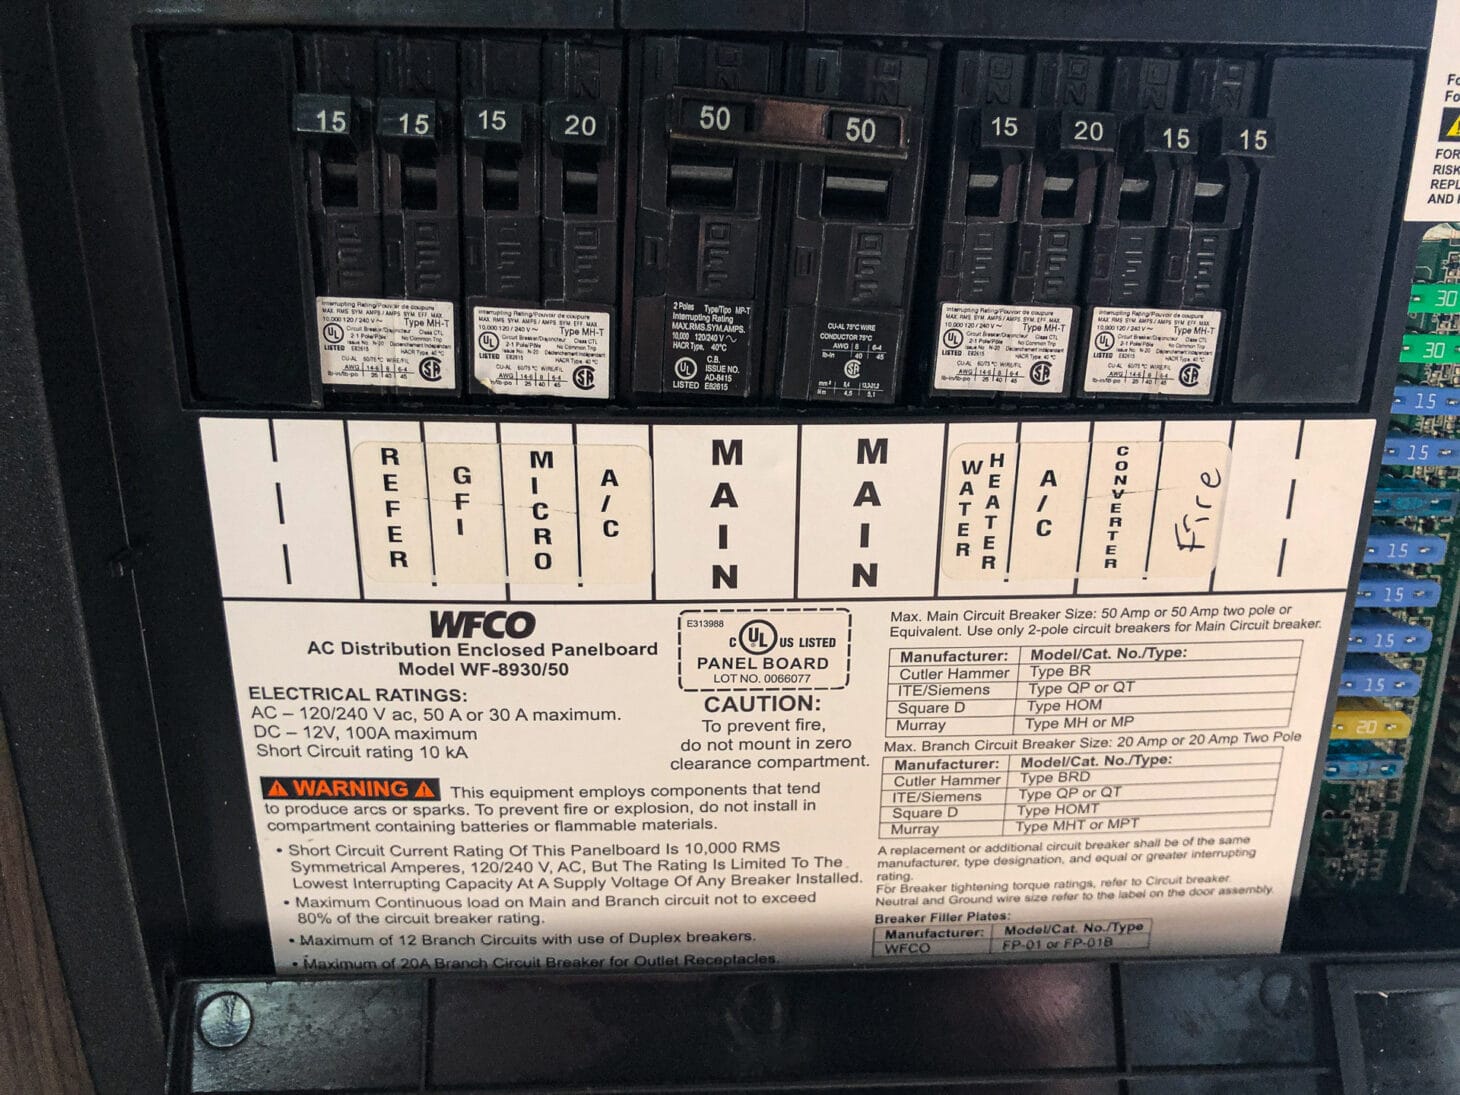
RV AC Keeps Tripping the Breaker at the Pedestal or Electrical Panel
Here’s what to do when your RV air conditioner continually trips the breaker at the pedestal or in the electrical panel of your RV.
Low Voltage Raises Amperage and Trips Breakers
Low voltage can cause an increase in amperage moving through the air conditioner, which causes its breaker to trip at the electrical panel inside the RV. Low voltage can be just as harmful as a high voltage spike and should be monitored by an EMS when plugged into shore power to prevent damage to all of your appliances.
Too Many Appliances at Once Can Overload Shore Power
Or, you could be exceeding the potential watts available for your RV by operating other 120-volt appliances at the same time. Keep in mind that when plugged into shore power, the converter always consumes 120-volt AC at various levels while charging the 12-volt DC coach battery. Plus, if you have a water heater or your refrigerator is set on electric, their combined use can trip the breaker outside at the pedestal. Turn off one of the other appliances before running the air conditioner.
RV AC Performance in Humid vs. Dry Climates: Delta-T and Moisture
If you travel between different climates, you might notice that your RV air conditioner performs better in dry areas like Arizona than it does in more humid locations like Florida.
What Delta-T Means for RV Air Conditioner Cooling
More humidity in the air means a lower “Delta-T” reading—this refers to the change in temperature between the return air and supply air. The air conditioner will continually run trying to overcome and dry off the evaporator coils. A dehumidifier inside your RV will help.
Humidity Can Freeze Coils and Cause Warm Supply Air
High humidity can also cause the evaporator coils to freeze and restrict airflow, which can produce warm air at the supply. Keep your fan speed on high and open the air dump feature instead of using individual registers and vents to regulate temperature.
How To Cool an RV Fast: Air Dump Mode and Smart Pre-Cooling
Use Air Dump Mode to Drop Cold Air Straight Down
Simply use the air dump feature. Close off all of the individual vents and registers and let the air from the rooftop unit dump straight down into the RV.
Pre-Cool the RV While Driving With the Generator
You can also turn on your generator and run the air conditioner during the final leg of your journey (yes, you can operate your generator while driving). While you drive, heat is absorbed into your rig, including in the walls, cabinetry, furniture, and flooring. Give your RV a head start by cranking up the generator and running the air conditioner before you arrive at the campground.
When to Call an RV Technician for Air Conditioner Service
These troubleshooting tips can help you handle some common RV air conditioner issues on your own. However, there are going to be problems that require the expertise of an RV technician, like annual servicing to clean filters, clean the evaporator and condenser coils, and test the capacitor and compressor—a capacitor is easily replaceable, but if the compressor is bad, you’ll need to replace the A/C unit. Unless you’re trained, don’t touch or remove the capacitor under the rooftop A/C shroud.
Meet the Authors