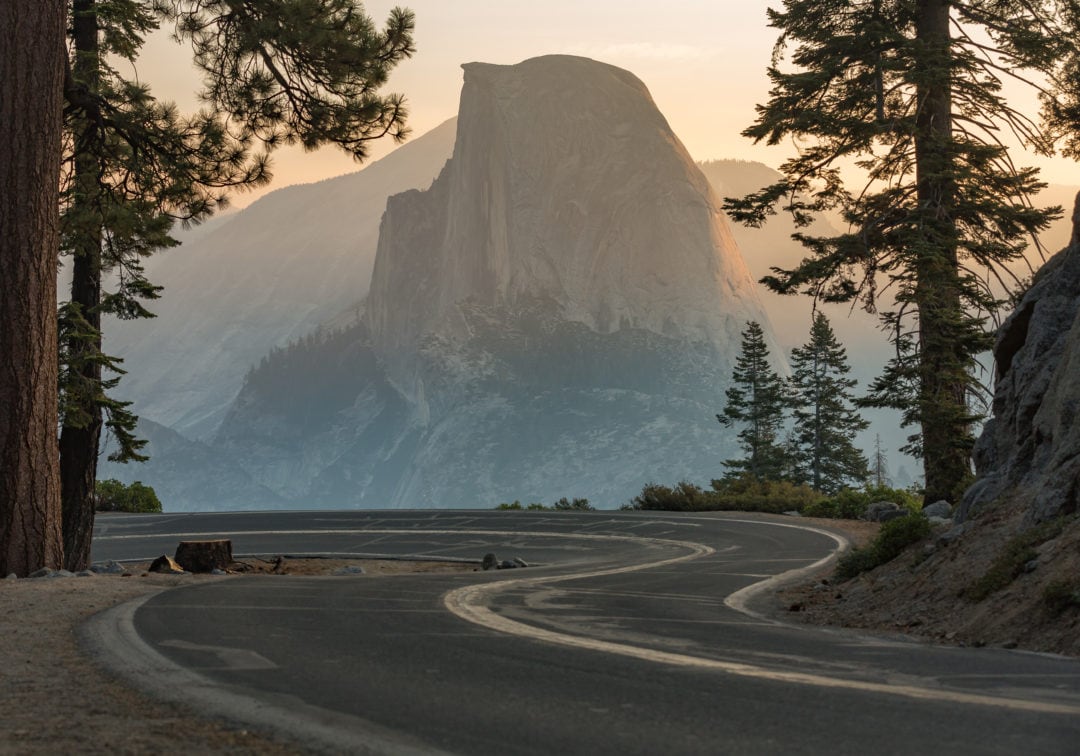
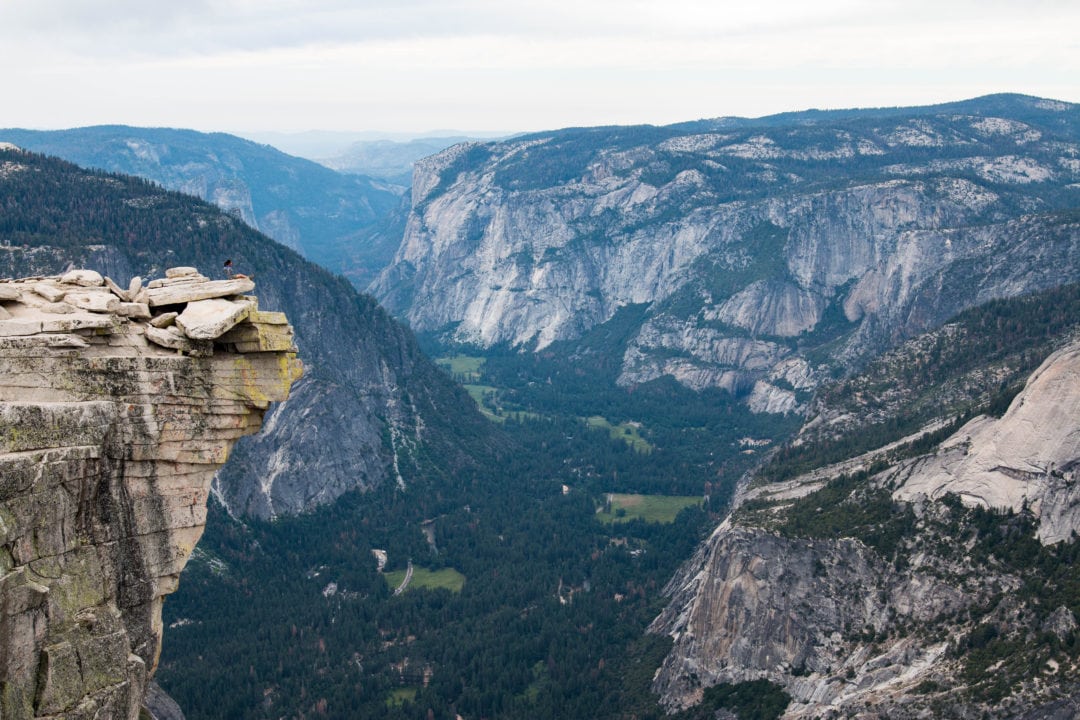
There are few hikes in the country as iconic as the hike up Yosemite National Park’s Half Dome. Visible from most of the park’s most iconic viewpoints, the granite cliff rises above the valley, challenging thrill-seekers with the promise of what must be an amazing view. It was described as “perfectly inaccessible” in the 1870s by famed geologist Josiah Whitney, so naturally, people decided to start finding a route up to its peak.
The route up the rounded side was finally conquered in 1875 by George C. Anderson, who made the ascent barefoot over the course of several days, drilling holes into the rock and jamming iron eyebolts into them for guidance.
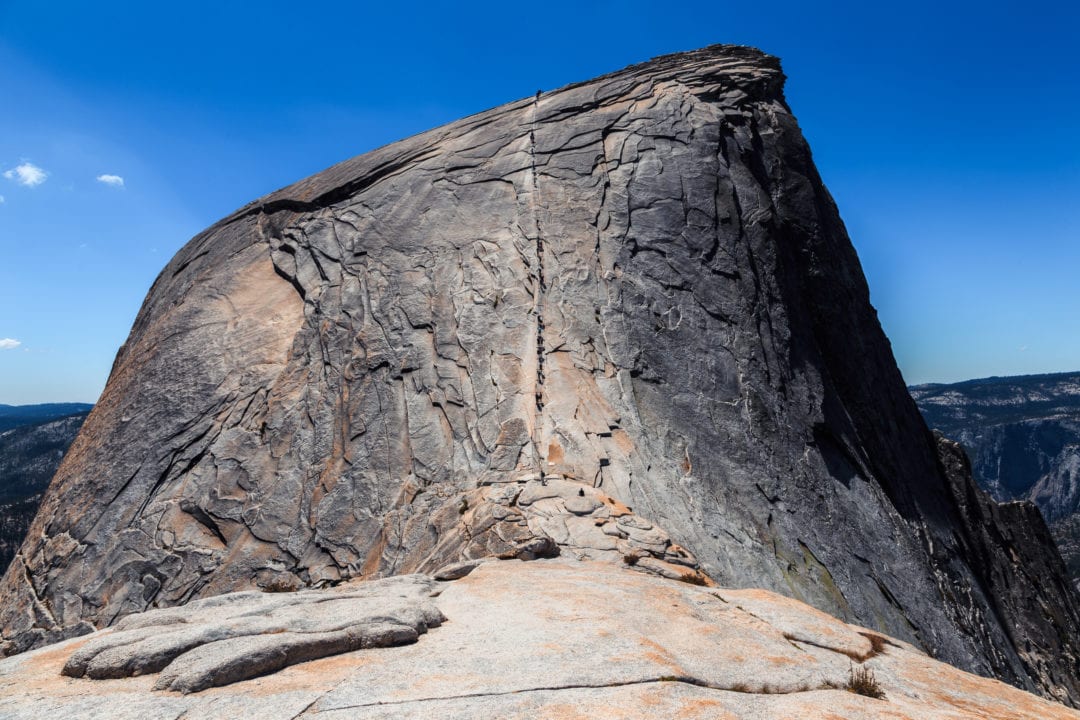
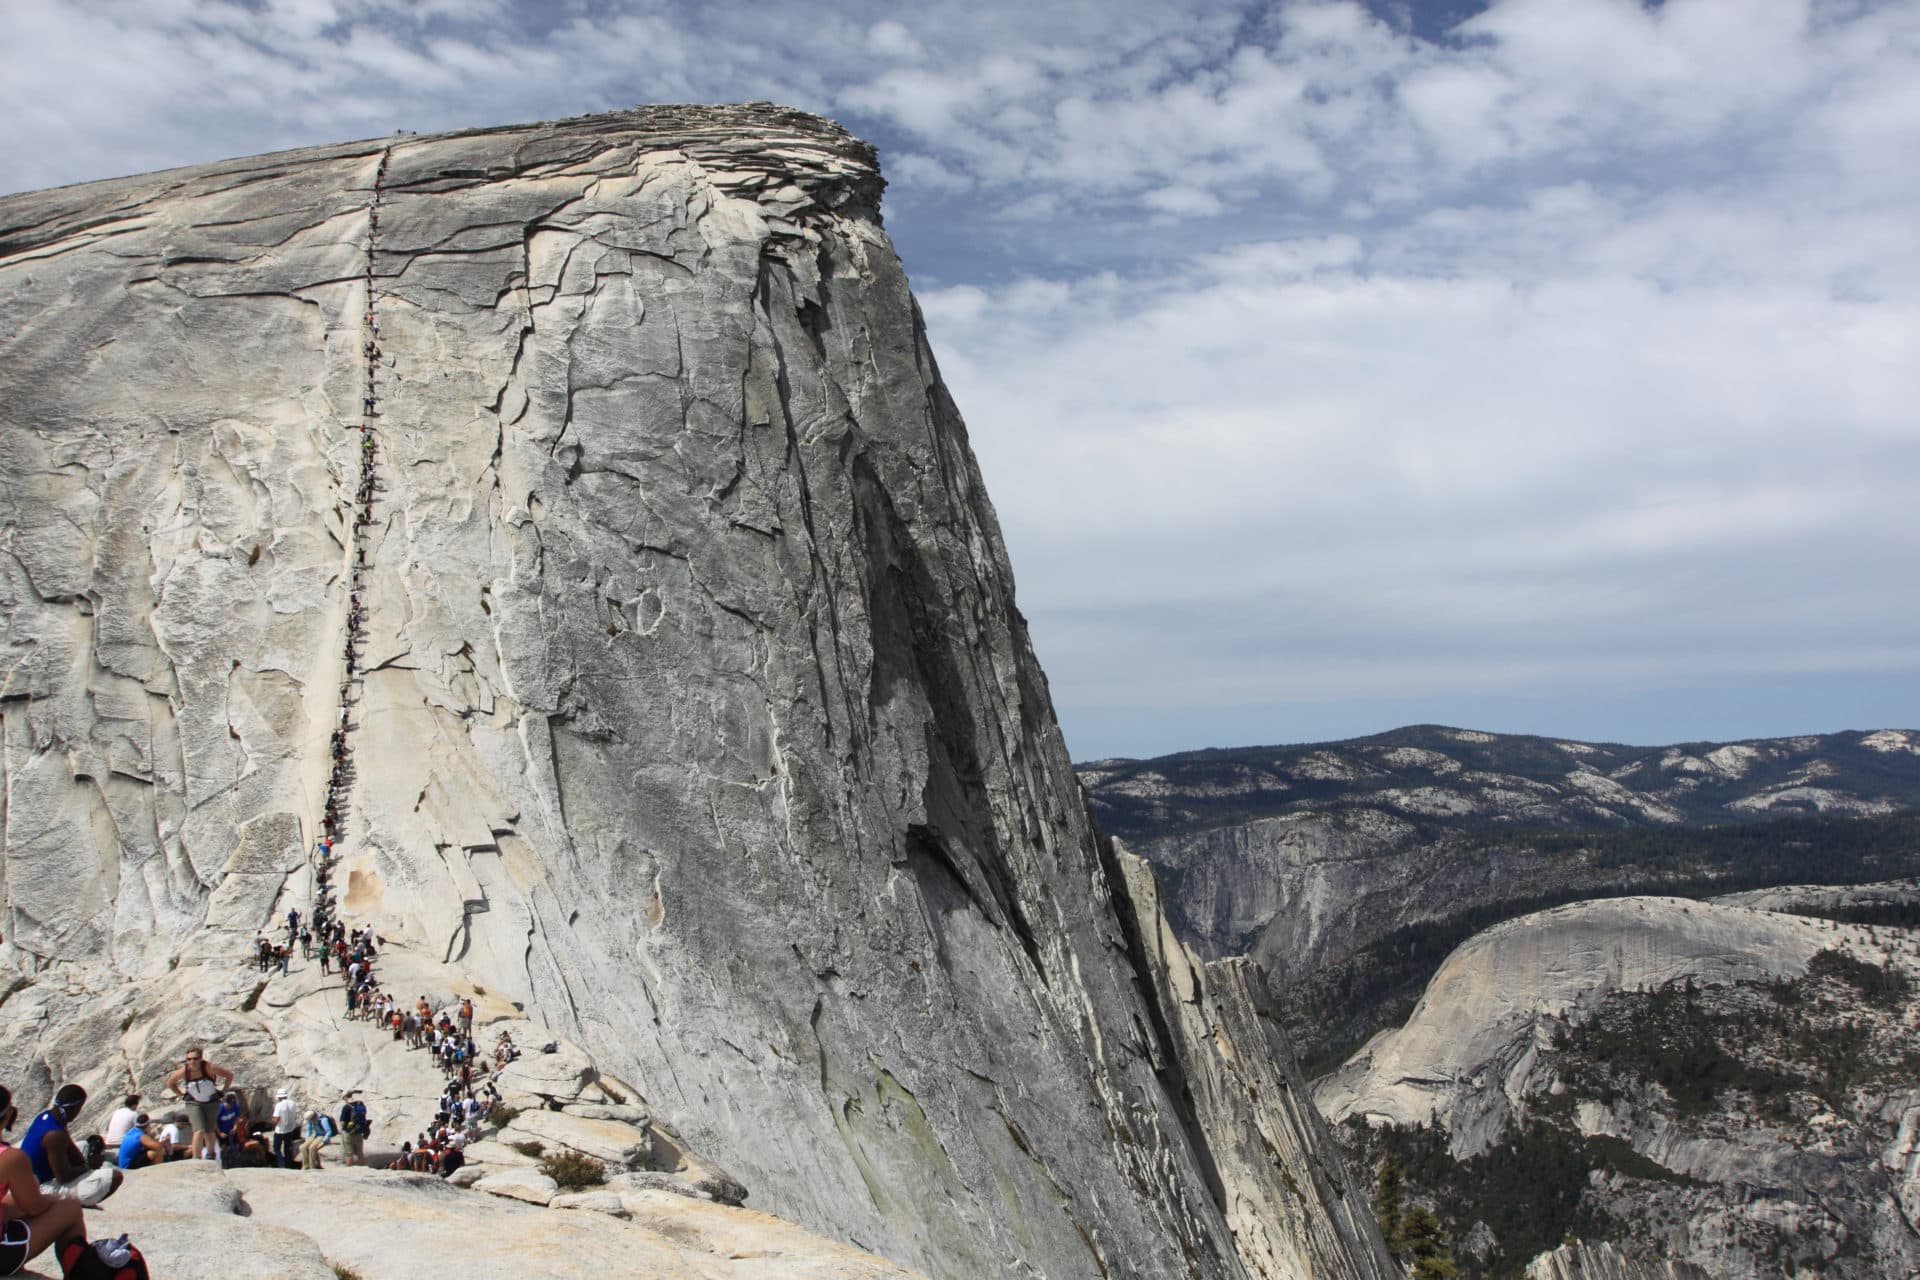
Luckily, the hike today is a lot quicker, thanks to the installment of braided steel cables. The cables (which were first put up all the way back in 1919) are in place from late May to early October, and make the once inaccessible trip into a day hike, albeit a challenging one.
And that, my friends, is why a permit is required to hike the famed trail.
There’s a good reason for the permits; limiting the number of hikers on the trail helps protect wilderness character by reducing crowding. This also helps preserve the natural and cultural resources in the area. And, perhaps most importantly, it helps improve safety on what can be a challenging hike.
A maximum of 300 hikers is allowed (about
Permit lottery opens March 5
Given that the hike is crazy popular, especially on certain days and weekends, permits are given out via a lottery. There’s a preseason Half Dome lottery in
Typically, the preseason Half Dome lottery opens March 1, but for 2019, the date has been delayed until March 5 due to a “transition to a new contracted provider”—but it looks like everything else about the process will run as normal starting then.
For the preseason Half Dome lottery, one person can apply for up to six permits and seven various dates, ranked in order of preference. You’ll only get permits if there are enough openings for everyone in your group on a given date. Groups must specify a leader who must be present with the group on the hike. Permits are not transferable (so if you’re planning some black market Stub Hub shenanigans—think again, slimeball!).
The application period for the preseason Half Dome lottery runs through March 31. Those who have applied for permits will get an email on April 10 with the results; they must officially purchase them before April 25.
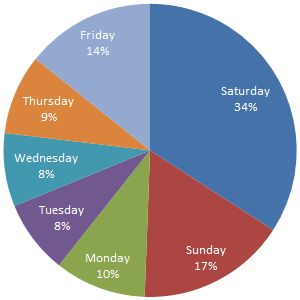
When entering the preseason Half Dome lottery, you can increase your odds of scoring a permit by choosing less requested days. The vast majority of dates requested are Saturdays; even Sundays have half as many requests as Saturdays. Monday through Thursday are generally more open, especially Tuesdays and Wednesdays. June and July are the more popular months, with August and September normally seeing fewer applicants.
Now for the bad news. This data is important because
How to score a permit
Here’s some slightly better news. About 50 permits are made available during each daily Half Dome lottery, based on cancellations, estimates on no-shows, and leftover permits.
You can enter a daily lottery two days in advance. These open at midnight and run until 1 p.m. every day, and those entering will get their results that night. (So if you want to hike Half Dome on Saturday, you can enter a daily Half Dome lottery for those permits before 1 p.m. on Thursday, and you’ll know if you got them or not by Thursday night.)
Weekdays at the end of August have particularly high daily lottery success rates. Looking at the whole season, the odds of scoring a daily permit in 2017 were 25 percent. And, here’s the kicker: The odds of scoring a permit in the daily lottery are actually going up each year.
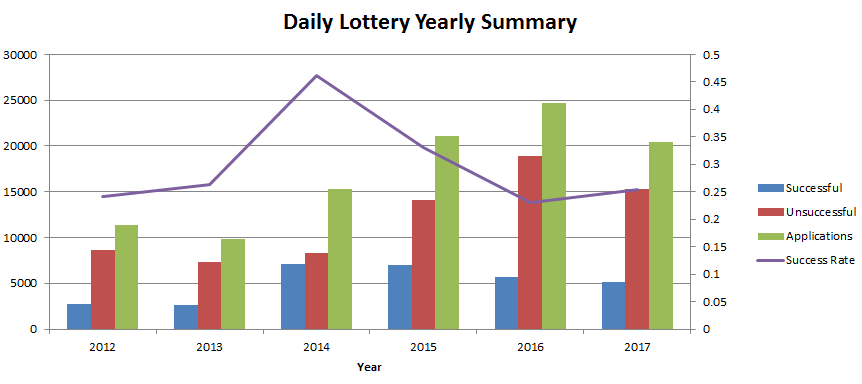
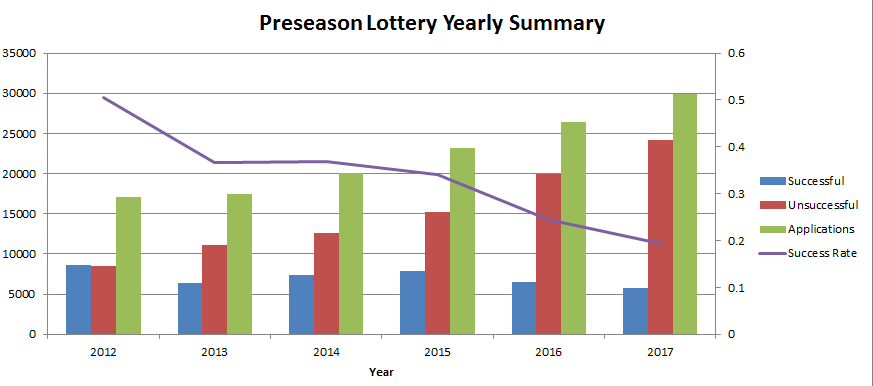
In 2019, the plan is for the cables to be up from May 24 through October 15, so that’s 144 days when hikers will be able to summit Half Dome. Only 43,200 people will be able to hike Half Dome each year. In 2017, 26,963 people entered the preseason lottery with that 19 percent success rate. The NPS has a data scientist who creates graphs based on Half Dome permit applications from recent years, and they make this info available on their website for a reason.
You’ll have to pay $6 to enter the Half Dome lottery, and if you get a permit, it’ll be another $10. That money goes directly to the rangers who work the sub-dome checking permits and making sure that everyone is safely prepared to make the climb, so it’s worth it. Plus, the $10 fee is refundable if you cancel or if the cables aren’t up for whatever reason.
So you got a permit from the Half Dome lottery. Now what?
Before you consider anything else, book a campground. The Upper, Lower, and North Pines Campgrounds are the three closest to the Half Dome Trailhead, but these are also super popular and reservations can be hard to come by, especially in the summer. Walk-in and first-come, first-serve campgrounds you might try the day you arrive include Camp 4, Bridalveil Creek, and Tamarack Flat.
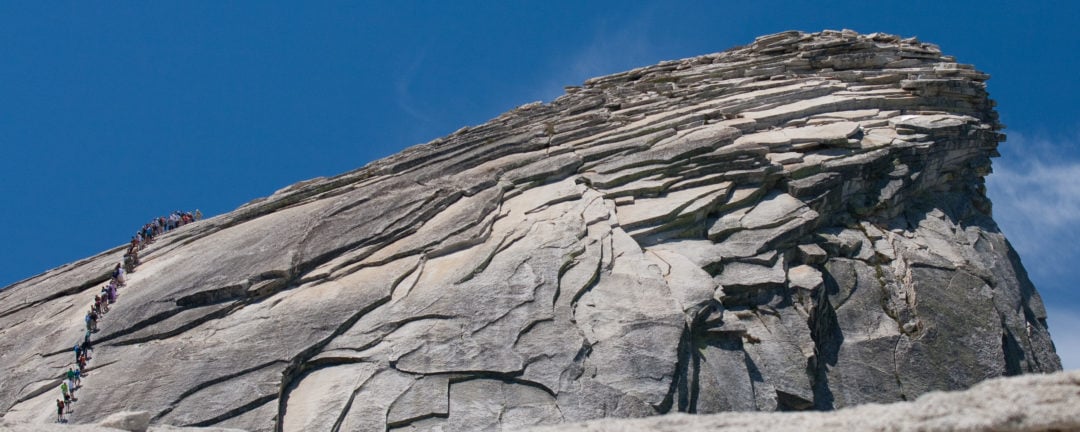
Another important aspect is planning for the hike itself. It’s 17-ish miles round trip and gains nearly 5,000 feet in elevation—and then there are those pesky cables. Plan for a 12 hour day; ideally, you’ll start at dawn, or even just before. Rangers suggest setting a non-negotiable turn-around time for your group that will leave you time to get back safely before it gets really late at night. For example, if you haven’t reached the summit by 3:30 p.m., you’ll start hiking back.
Trailhead parking is just beyond Half Dome Village, or if you’re taking the shuttle, hop off at stop #16, Happy Isles. Keep in mind that the shuttle doesn’t start until 7 a.m. Once on the trail, your first step is to hike up to the top of Vernal Fall; it can be slippery in places here, so watch your step. Then the trail continues to the top of Nevada Fall.
Next is a sandy hike through the Little Yosemite Valley. The trail then goes through some forested wilderness as it approaches the sub-dome. The hike up the sub-dome involves even more stairs until you hit the cables. This is where rangers will check your permits and make sure that your chosen group leader is present.
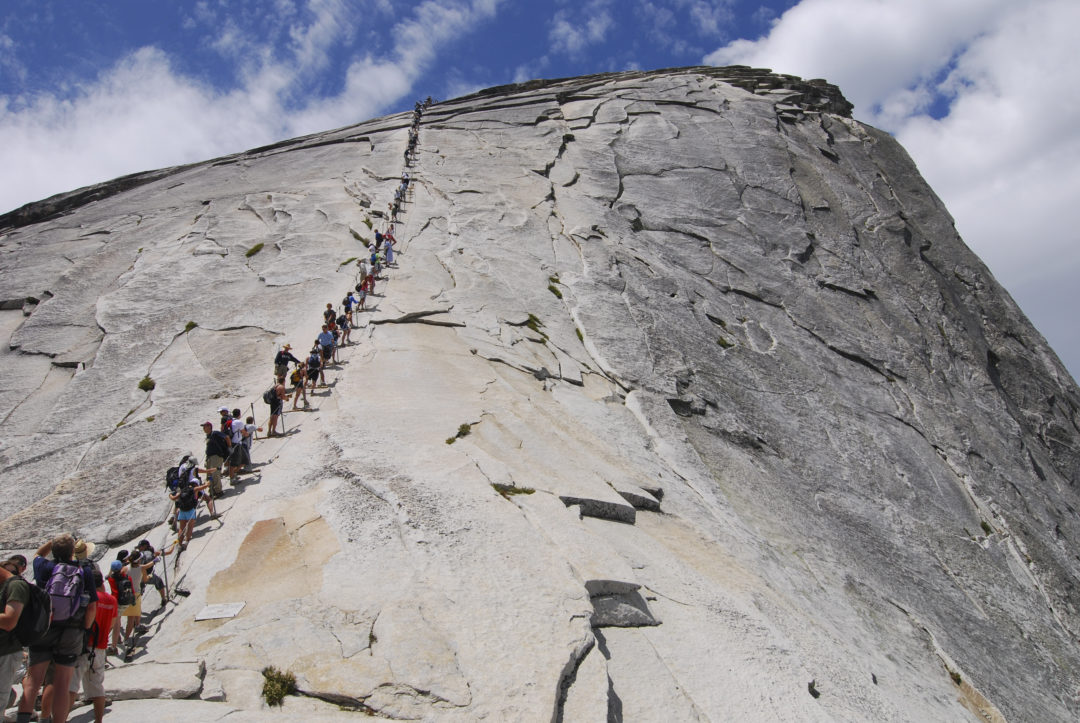
The weather is key. Even if there’s light rain, the cables can be incredibly dangerous, so rangers caution hikers to stop and evaluate the weather once the cable portion of the hike is reached. If there’s even a chance of rain or strong wind, consider calling it a day. Lightning especially is a huge concern—the cables are metal and are totally exposed to the elements. Weather can change quickly, especially from when hikers start early in the morning to when they reach the cables in the afternoon.
Yosemite has an amazing Search and Rescue team just in case anything goes wrong, but there are lots of precautions hikers should take to avoid worst-case
Wear proper footwear; tennis shoes won’t cut it on this trail. Honestly, I can’t think of anything worse than finally landing a permit, going to Yosemite, waking up before dawn, and twisting your ankle on the first part of the hike.
You’ll also need to bring along (and drink!) about a gallon of water per person. Keeping your energy up with plenty of nutritious food is important as well. Other supplies to bring along include layers of clothing, a flashlight or headlamp with fresh batteries, gloves for the cables, and a first aid kit.
You’ll have to pack out your own trash—and this includes toilet paper. There are composting toilets scattered along the trail up until the halfway point, but after that, you’ll have to go au natural. Remember to pick a spot far from any water and to bury your—ahem—number twos nice and deep.
Also keep in mind that the hike takes you to some pretty high elevations, so you’ll want to focus on your breathing. Be sure to save some energy for the hike back—getting down the cables is just as challenging as climbing up them. And, of course, it’s important to make sure that you’re physically capable of completing the hike before you plan for it.
