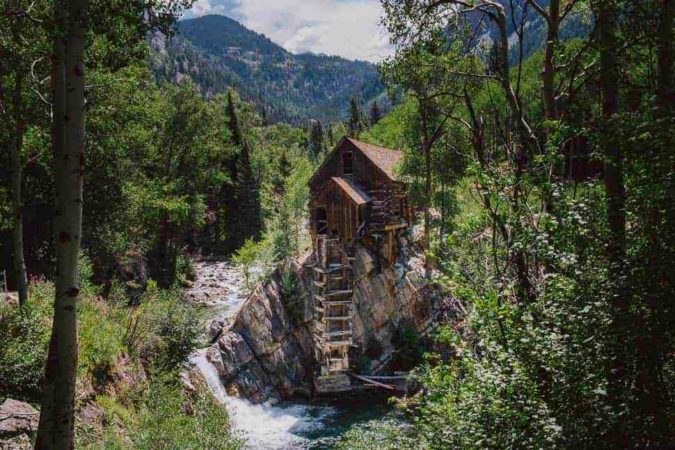
To visit Crystal Mill in Colorado is to experience an almost impossibly beautiful juxtaposition of early industrial craftsmanship and the natural landscape surrounding it. As it turns out, though, Crystal Mill is not really a mill at all.
The turbine and shack that surround it were originally built in 1892. Driven by the flowing water of the Crystal River, the facility was used as an air compressor that powered pneumatic tools and helped ventilate local mines. More than an air compressor, it was essentially a power plant. In fact, in its working days, it was called “Sheep Mountain Power House.”
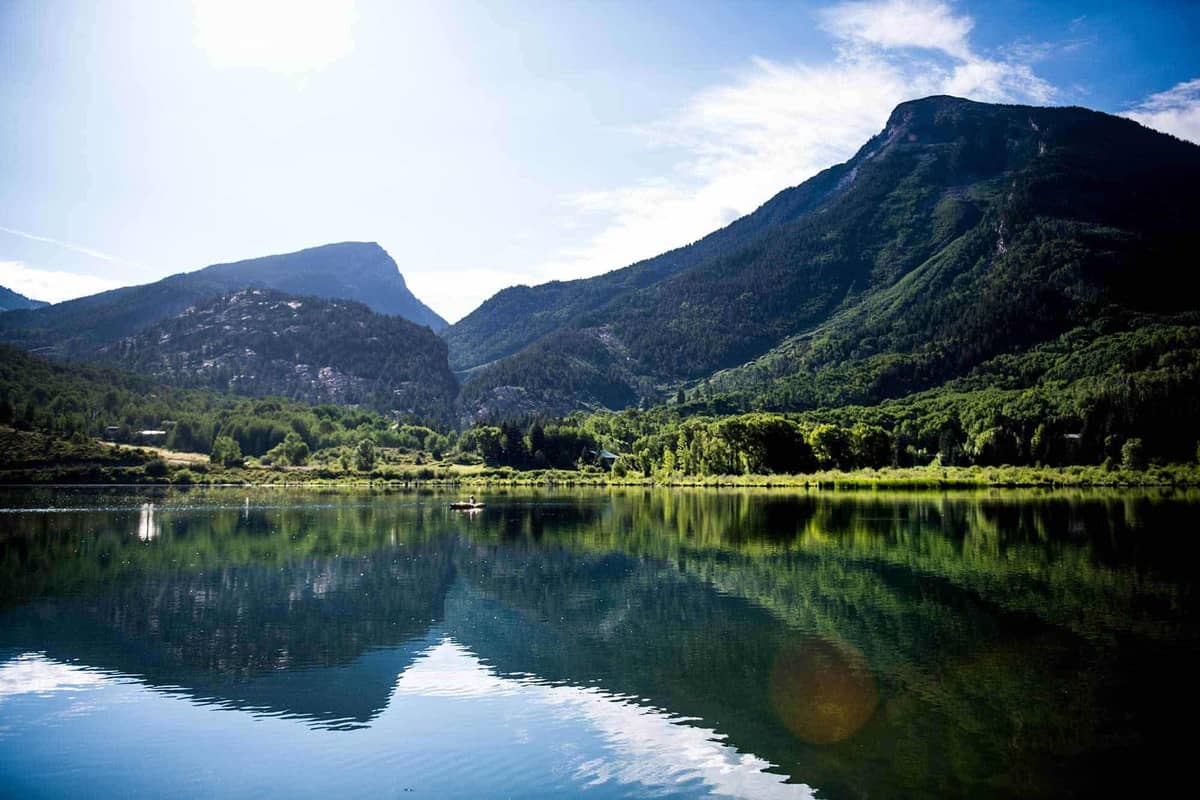
Decades now into its proverbial retirement, the old mill sits abandoned. And it’s become a spot that is much sought after by hikers, tourists, and photographers. Reportedly receiving a thousand visitors a day, locals say that it’s a constant race to see which location sees more foot traffic—the mill or the nearby Maroon Lake, from which you can spot the twin peaks of Maroon Bells. As of last year, our guide told us, Crystal Mill was number one.
Because of the natural beauty that surrounds it, capturing an Instagram-worthy photo of Crystal Mill is not difficult. However, getting a shot that no one else is getting is a different story.
Further reading...

A bumpy ride
My journey started in Marble, Colorado, a town that is accessible from either of the major east-west roads that cut through the state. Marble happens to be a hidden, wild, rustic wonderland that is every bit as enjoyable as the mill itself.
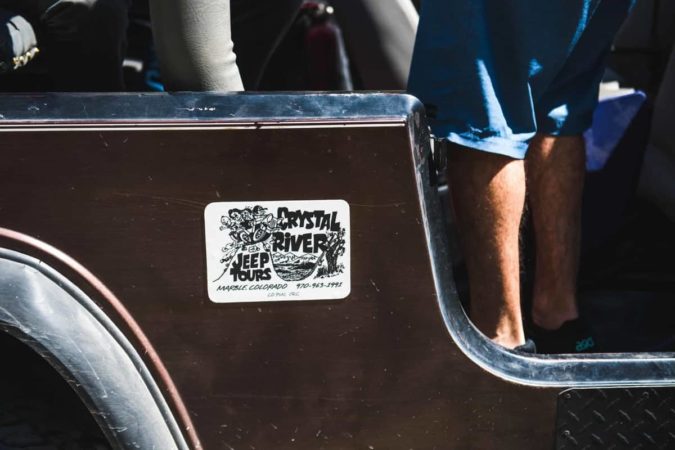
While it’s possible to hike to Crystal Mills from Marble, I opted for a Jeep Tour, booked through Crystal River Jeep Tours the day before. The Jeeps depart for Crystal Mill twice a day, and the tour costs $75 per head.
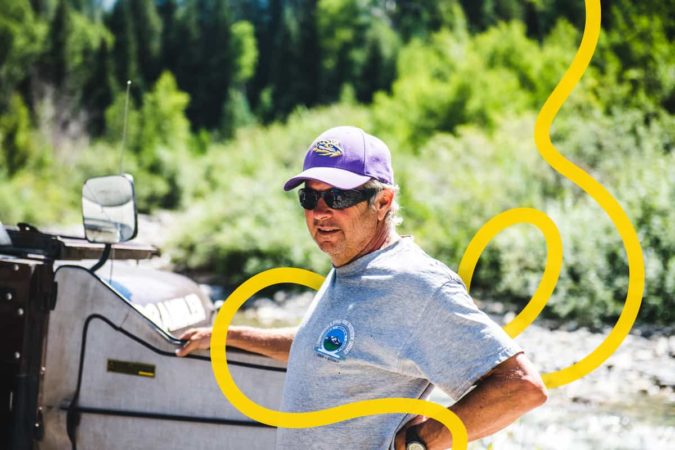
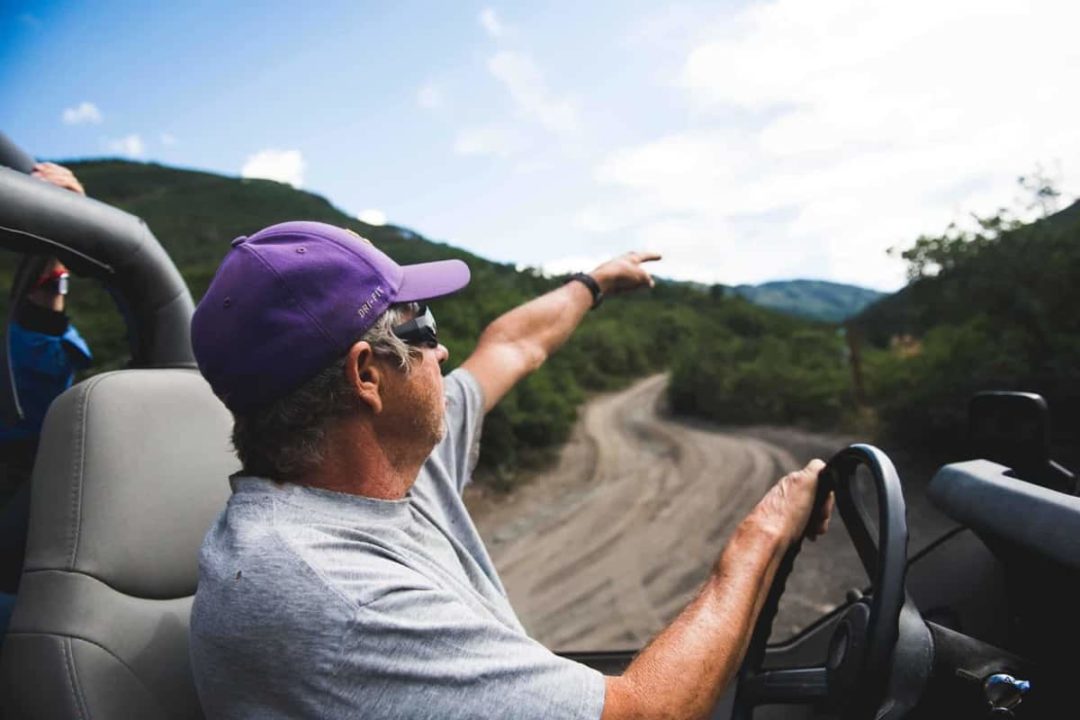
Queuing up next to the black, dust-encrusted Jeep with the other tour attendees, I saw a bowlegged older gentleman in a purple baseball cap sauntering toward us. This was Tony Petrocco, our Jeep driver and tour guide.
Tony quickly turned out to be extremely knowledgeable about the area and the history of the surrounding towns and sites. He had gathered his wealth of information over the years, holding several prestigious jobs in Marble, including mayor. Now, in addition to guiding the Jeep tours, Tony is a volunteer firefighter and EMT.
We jumped into a 1980s era Jeep Scrambler, a vehicle capable of taking the abuse that the unpaved trail out to the mill would deliver. As the Jeep lurched forward, Tony handed me a binder of photos he’d collected of overturned cars—ones that weren’t prepared for the journey.
Between dodging divots in the trail, Tony added even more texture to the already rich landscape. We passed by a lake playing host to dozens of row-boaters and summer lake-goers.
“That’s Beaver Lake. It’s owned by the state of Colorado and run by the Colorado Division of Wildlife. It’s got lots of fish in it. So, if you can’t catch a fish, this is the place to come,” Tony said with a wink.
As the road started getting rougher and we bounced down the trail, Tony explained that the roads were made up of essentially one of two materials: shale or granite, depending on the makeup of the mountainside we were passing through. ATVs kick up the rocks and make for a highly uneven surface, which further worsens the already bumpy terrain.
It’s not a ride you’d want to take in a vehicle that’s not made for this kind of terrain. Although, based on the pictures of upside down sedans and pickups in Tony’s binder, many still attempt it.
Soon we came upon a second lake, Lizard Lake. Made up of runoff from the snowy mountains, it’s deeper and colder than Beaver Lake—but no less picturesque. At this point, the road started narrowing, and Tony pointed to a long string of rocks along the mountainside ahead.
“Straight ahead is where the quarry is,” he explained. “Now, that marble vein goes from Yule Mountain all the way across Whitehouse Mountain and comes out on the other side. They take all this marble and send it to a quarry in Italy and that’s where they mill it. Seventy-five percent of the marble ends up in the Middle East or India.”
NOW, THAT MARBLE VEIN GOES FROM YULE MOUNTAIN ALL THE WAY ACROSS WHITEHOUSE MOUNTAIN AND COMES OUT ON THE OTHER SIDE. THEY TAKE ALL THIS MARBLE AND SEND IT TO A QUARRY IN ITALY AND THAT’S WHERE THEY MILL IT. SEVENTY-FIVE PERCENT OF THE MARBLE ENDS UP IN THE MIDDLE EAST OR INDIA.
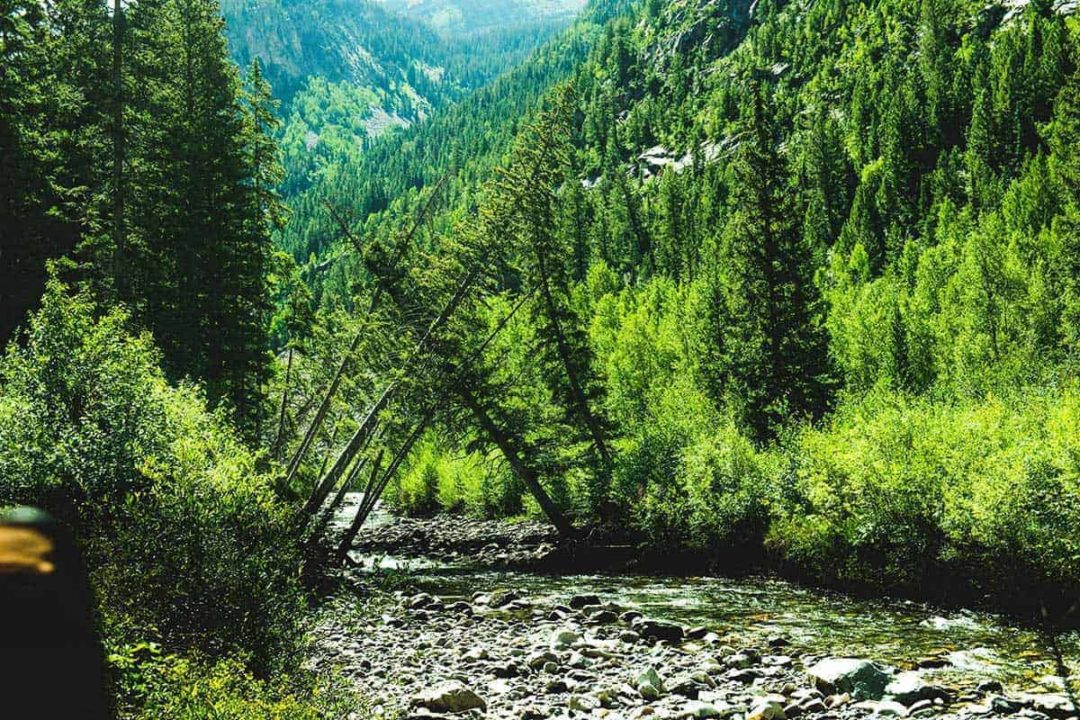
We managed a quick stop to walk along the Crystal River. It was a welcome break from the bumpy road, and a chance to touch the cold, running water. Downstream, the fly fishers were casting their lines. Birds of all kinds flew by and distant rain clouds were only just beginning to gather behind the far off peaks.
We climbed back into the Jeep and continued on. As we kept moving, the road turned from shale to granite. The looser rocks and bumpier ride made it too loud to tell stories. Instead, we just took in the views.
Capturing Crystal Mill
After the hour or so of losing ourselves in the rocky road, the long sight lines, and the Colorado flora, approaching the Crystal Mill viewing area felt like a sudden revelation. In the moments before rolling to a stop, the road widened into a nice slow curve where it was easy enough to park a few Jeeps. Others Jeeps had already stopped and congregated, and exhausted trekkers were drinking heavily from their thermoses.
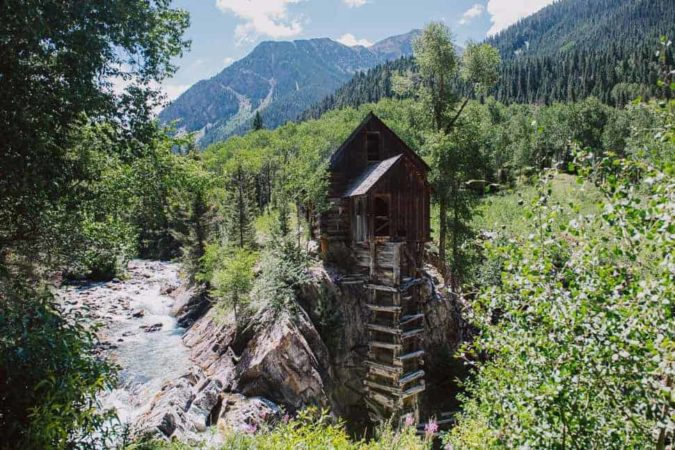
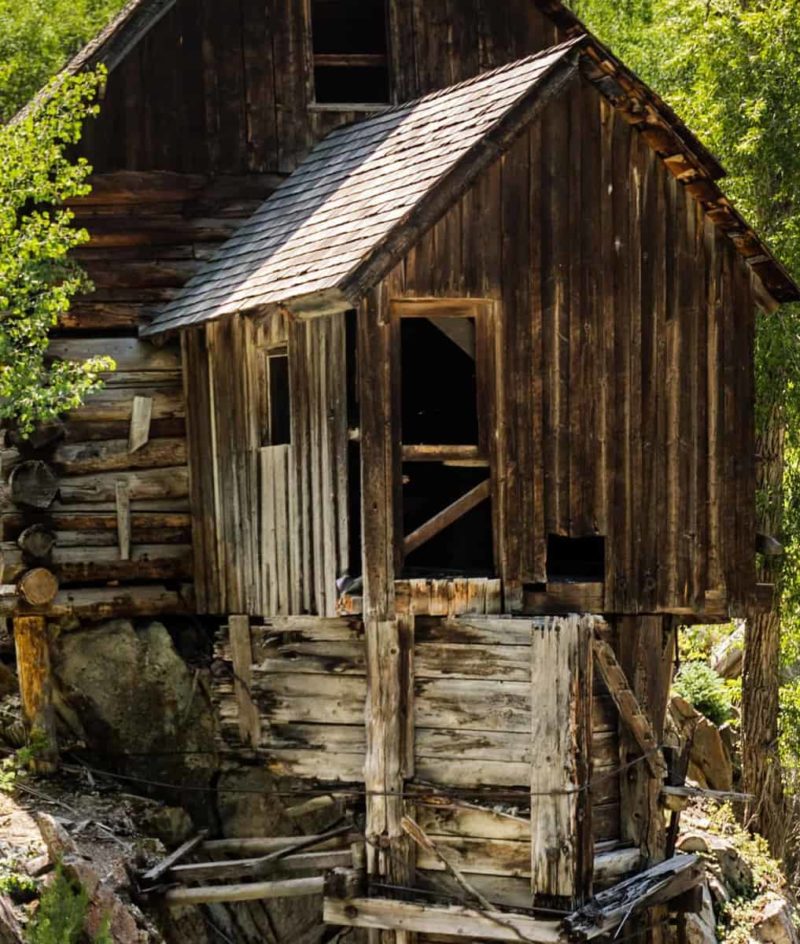
It didn’t totally dawn on me that this was the spot until I heard the gasps from the others in the Jeep. I whipped my head to the right and there it was, peeking through the Rocky Mountain maples—this large wooden relic across the river, every bit as beautiful and eerie as photos would suggest.
It’s hard to take it all in at first, as the location of the mill looks almost unreal. My trance was broken by the sound of Tony explaining to the group that we could either keep going to the small town of Crystal about 15 minutes further up the road, or stay and get picked up on the way back. Everyone headed off but me. I needed to take this in—a five minute stop was not going to be enough.
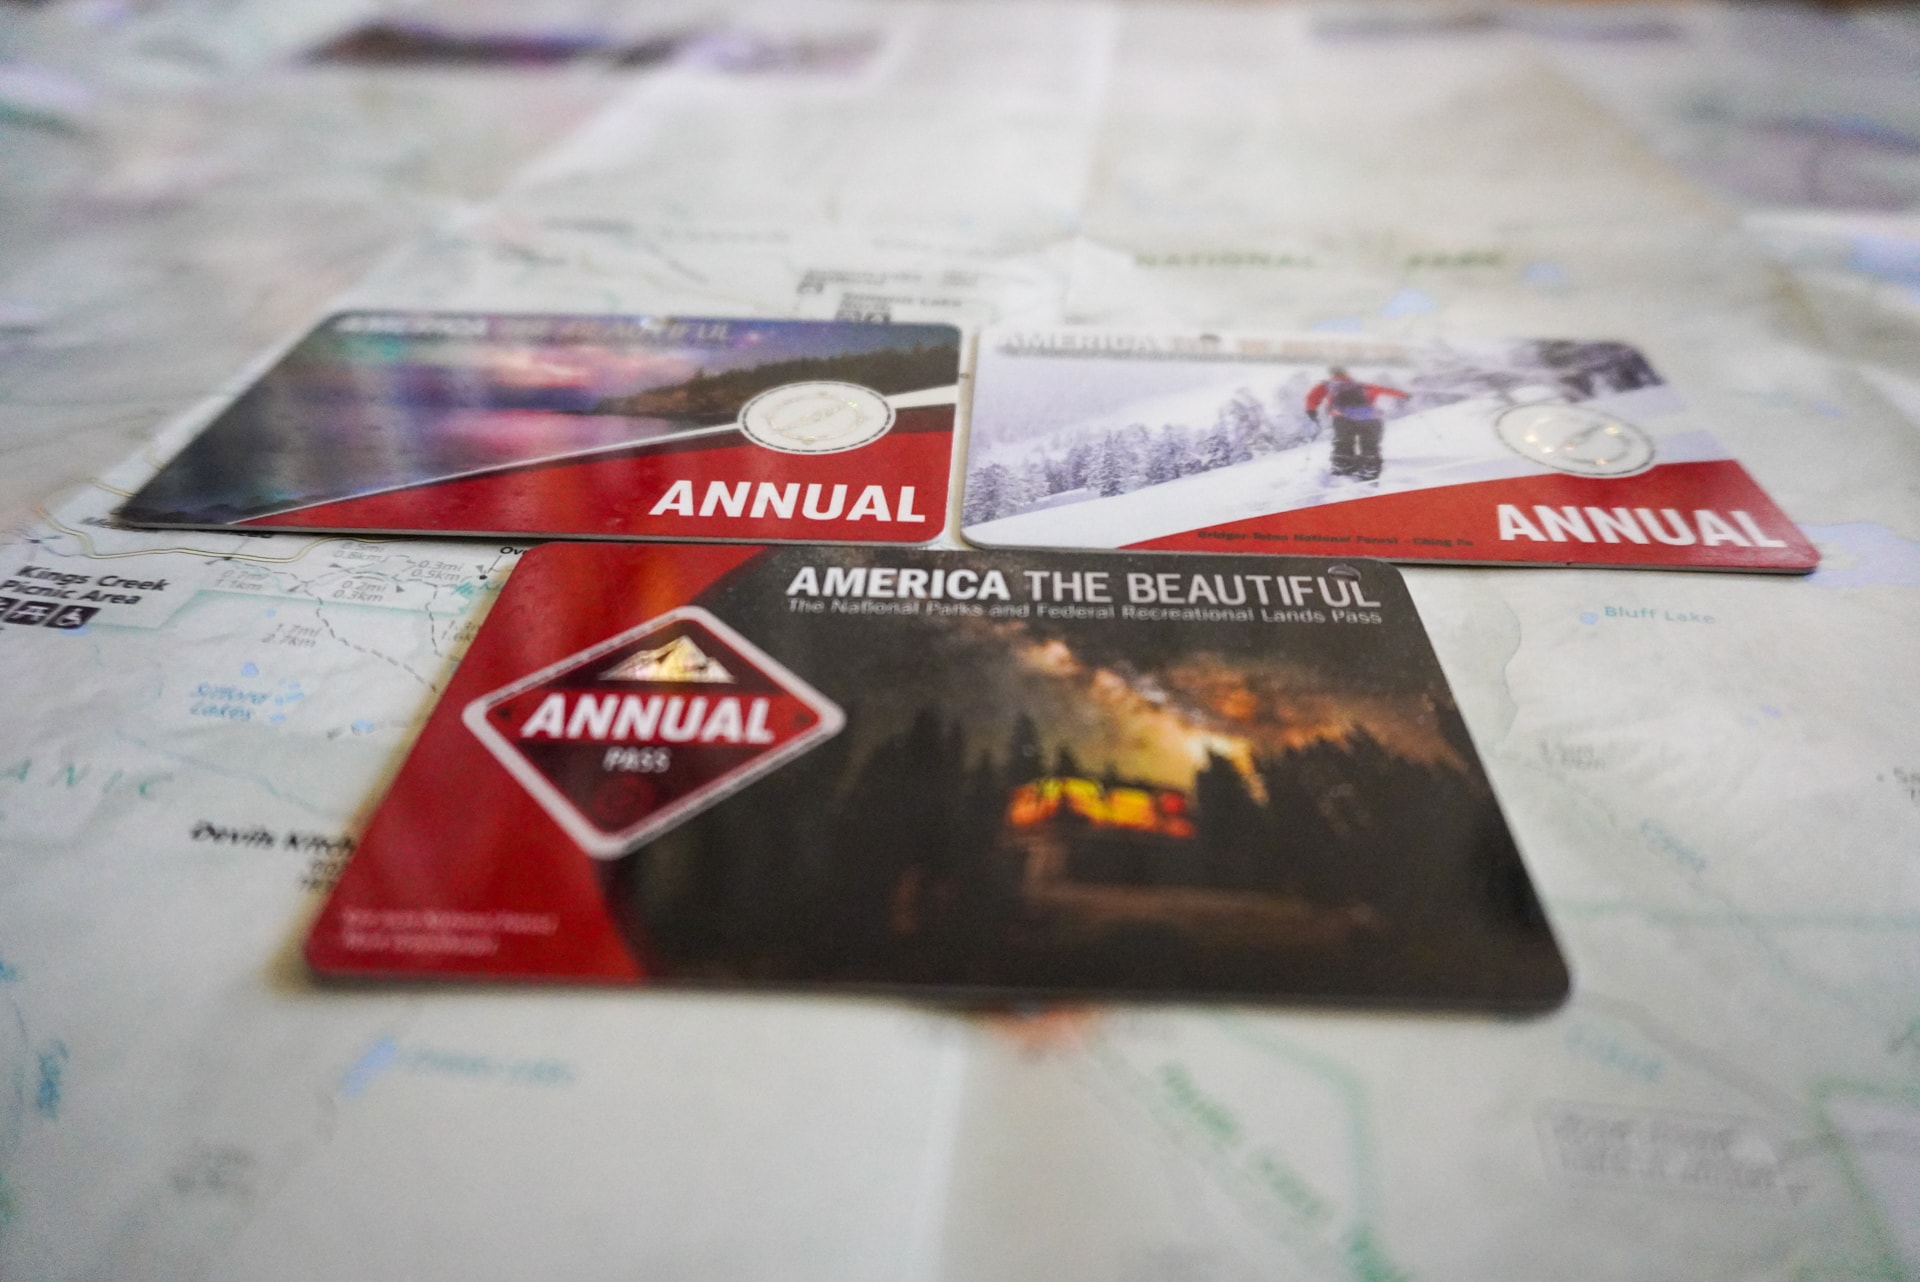
There were two main areas from which to view the mill. Both were quite nice, and photographers were casually strolling back and forth between them, chatting about settings and glare. I learned that one can procure a pass from the town of Crystal that offers access to those who’d like to hike down to the river, but my limited time suggested that would be a journey for another day.
Eventually, and too soon, Tony returned. I didn’t know how much of my camera’s memory card I’d filled up, but it hardly seemed like it could be enough to capture this unnatural wonder. The ride back seemed longer than the ride out and I thought about days before my time—days of marble miners and fly fishermen. I soaked in the Colorado air and wondered—in that way that sometimes changes the course of rivers—what would it be like to live here?
Getting the epic shot
When visiting popular spots like Crystal Mill, there’s usually the shot that pretty much everyone gets, and then there’s the one that’s a little more unique—the one I can call my own. This is how to capture Crystal Mill a bit differently than the thousands of shots of the same spot that already flood social media.
In preparation for shooting any spot, I do some research online by checking Roadtrippers, Google, and Instagram. It’s often this kind of research that leads me to a specific shot, and it was the case with Crystal Mill, too. I like to remember what emotional qualities brought me to a location as it offers me the clues to how to shoot it in a way that captures that emotion. It’s easy to forget this when you’re holding your camera and framing an image. So my first step is reminding myself of why I’m here.
Crystal Mill appealed to me because of its lost-in-time qualities. Its unique design and abandoned look mixes so beautifully with the lake and mountains surrounding it that feels like being transported back to a forgotten time. So, with that as an inspiration to come see it, I could not possibly let go of it in deciding how to shoot it.
Pushing past ‘usual’
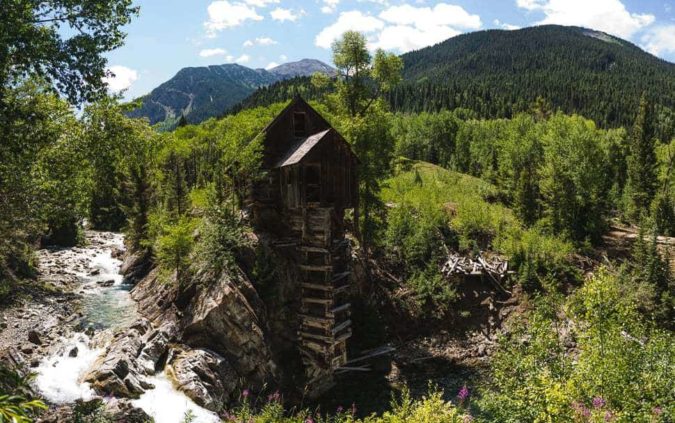
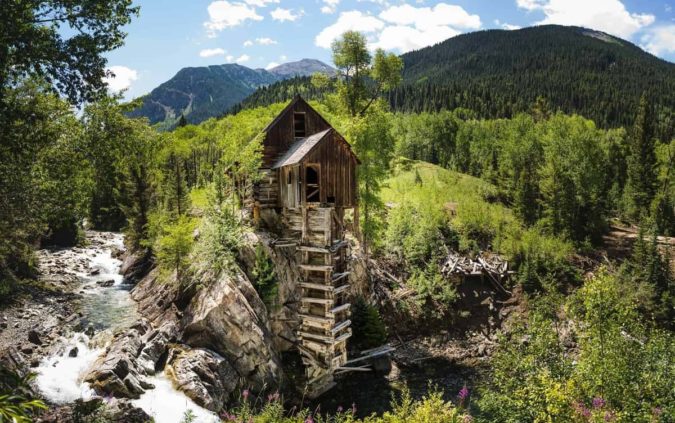
When you arrive at the stop where Crystal Mill is, there are two main areas where people are taking photos, and you can see in these photos how they differ. The second one is only 30 feet or so from the first one, but they frame the mill a bit differently. The first angle, which our guide said is his favorite, is certainly a more classically composed image, as the river hugs the mill more closely and the trees frame the shot. Not surprisingly, it is also the shot that nearly everyone takes. There’s no denying it’s a fairly perfect photo—so the question is, can you do something different?
The options are limited.
You can head into town and buy the ticket (and sign the waiver) that allows you to climb down to the river and take shots from down there. And while I didn’t go down there myself, I looked at more than 100 photos by people who had and the angle didn’t appeal to me. In that angle, you lose the surrounding mountains and the mill actually appears more “normal.” The power of the image is the mill’s relationship to the river and the mountains. Getting up close loses a lot of that narrative.
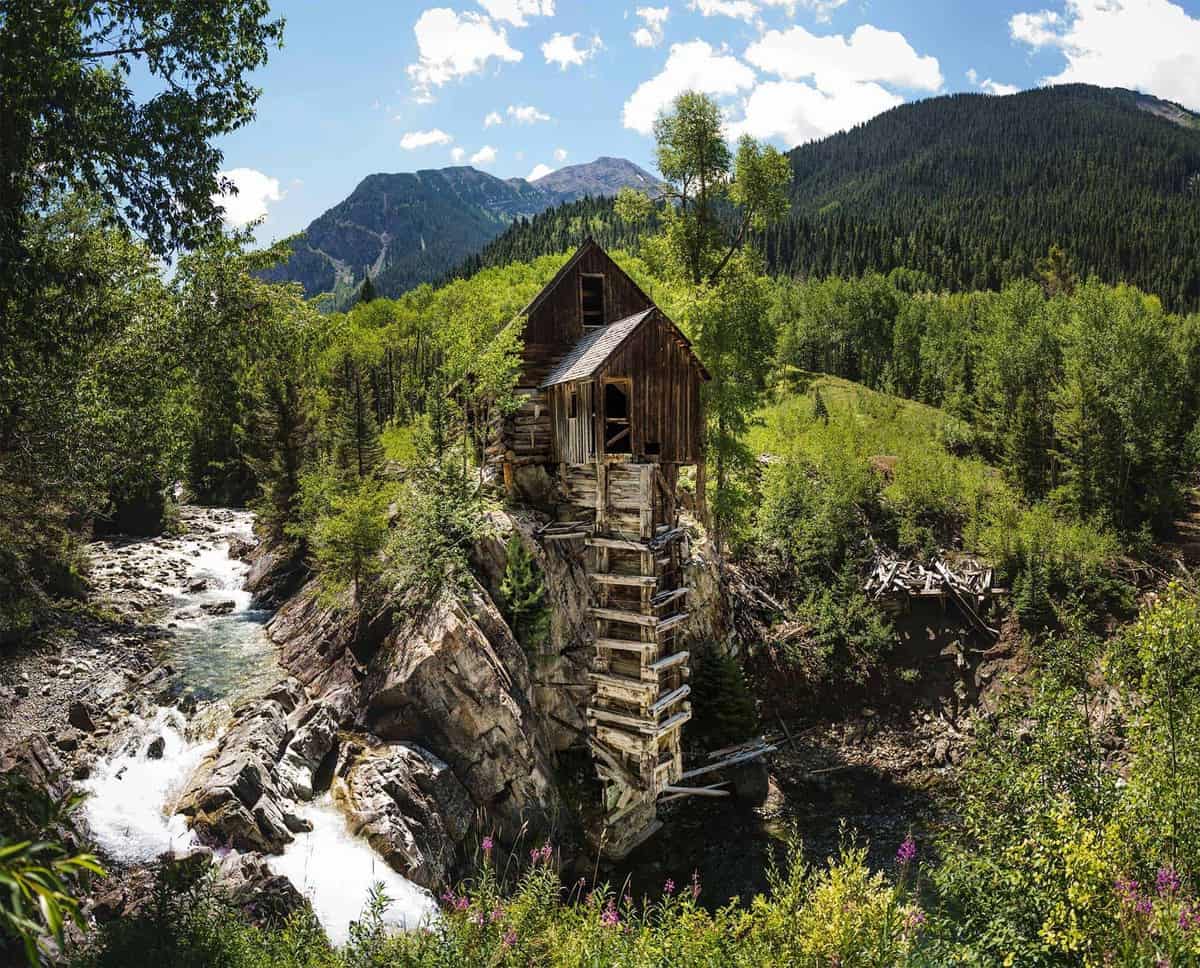
So, to try something unique, I went back to the second spot, hopped over the rope that guarded the trail down, and stepped just a few feet forward. Nobody seemed to have a problem with me doing that, and it was perfectly safe. And it was there that more of the Colorado landscape became apparent to me. In the two angles most shot, the river to the left and the mountain above it are our biggest clues to the mill’s environment. But there are more mountains to the right of the mill that you see when you push just a little bit further in. That entirety of landscape, where the mill can still be the center, but more surrounding context can be drawn, seemed to be the image that was not being taken, and enhanced my original emotion about the mill—this fairy tale-like location, set into beautiful Colorado. And that was the photo I wanted.
Framing the photo
Here’s the thing about landscapes—they are full of detail. In this scene, there are leaves in the foreground, textures of wood in the mill, rushing water, distant mountains, you name it. It’s a dense and rich scene where the more of those things popping into our line of vision, the better. So, you want detail—lots of it.
This is tricky, though, because you want a very wide shot to get the full picture of the surroundings. You also want all the detail in each part of the picture. Those things don’t usually mix too well—and not everyone has an expensive super-wide lens that can handle all that. This is a perfect situation for a panorama.
A panorama shot offers a few great things for a location like Crystal Mill:
- You can use a normal lens, which gives a view of the subject that’s close to what you can see with your eyes. Wide-angle lenses distort your scene So, by stitching together a number of regular-width shots, your final image appears more true to reality.
- Each shot has full detail. So you’re multiplying the amount of detail by the number of shots you’re taking. This is hugely helpful when adjusting your image in post-processing. It gives you more flexibility in every area: from the sky to the water to the leaves to the wood. And this kind of image adjustment is exactly where the big visual differences in imagery occur. A panorama gives you a lot to work with in your darkroom.
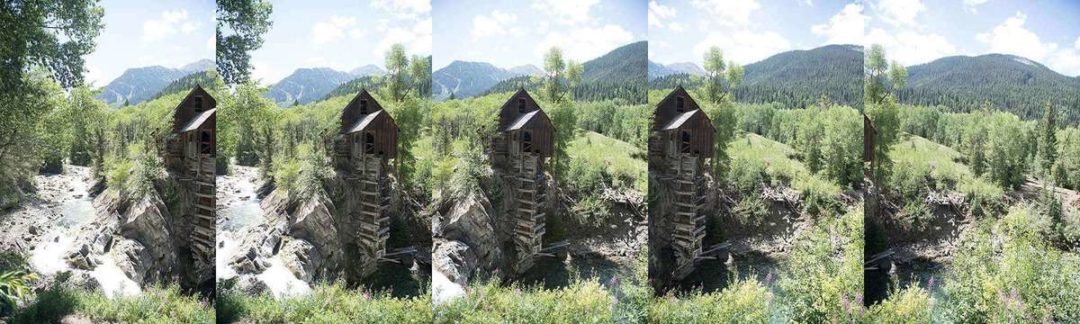
There are a few ways to take panoramas, one is to take a grid of photos, usually referred to as the Brenizer method. The other is a straight line across—the way your mobile phone will do it. The Brenizer method is great when you want a shot that is both wide and has a shallow depth-of-field (blurry background). But here in the pure landscape shot, the straight-across method works just fine. I turned the camera sideways (portrait) to maximize the height of my shot and took five images that overlapped quite a bit:
I let Lightroom stitch it together, but this can be done in Photoshop or free standalone panorama apps (like Hugin or AutoStitch). For those who want even more features, you can pay for software like PTGUI Pro or AutoPan Pro. With these, you can mask out elements, edit specific points, straighten horizons, and even put together images shot using the Brenizer method. Once together, the image looked like this:
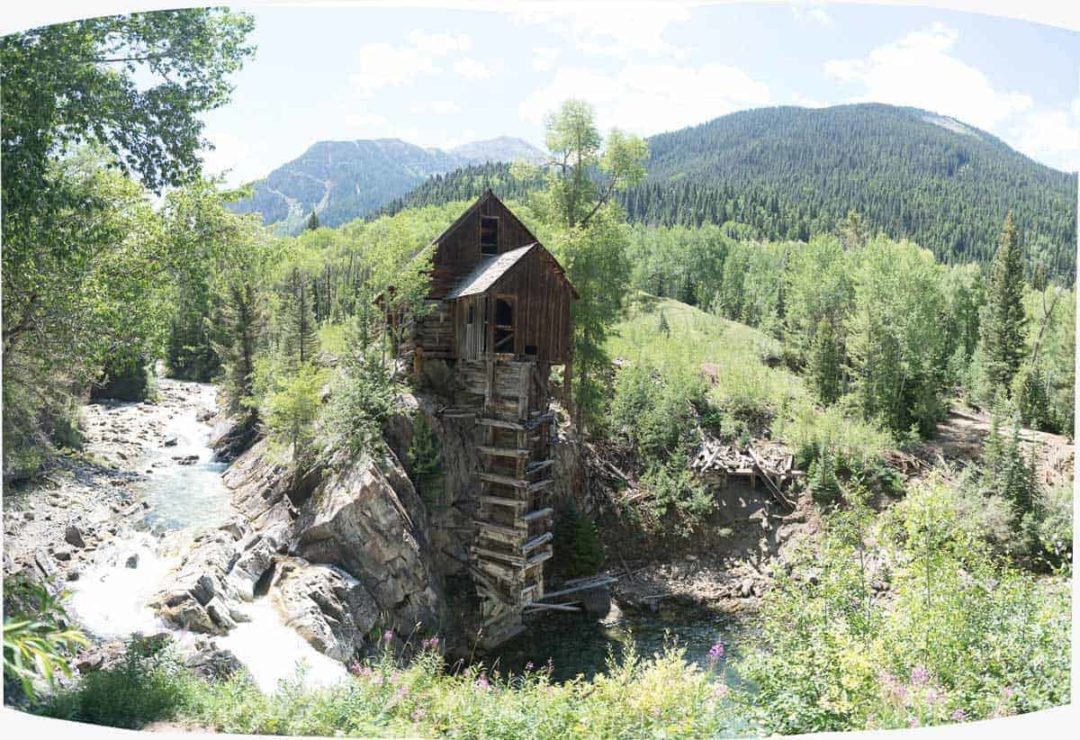
While not quite the beautiful shot I ended up with, it’s a great RAW image to work with, offering much more of the countryside and a heroic view of the mill. Not to mention, more detail than any single shot could ever grab. And this versatility is key in what I will do to the image next.
Details
You might notice that the image above looks pretty light. In retrospect, I could have shot this a stop or two darker (I was at f/5.6, but could have done it at f/8). I had my ISO settings as low as possible (with my camera, that’s under 100), as this gives me the highest fidelity image (higher ISO, more noise), and my shutter was very slow (and on a tripod). The longer I can keep the shutter open, the more of the image hits the sensor for detail. I also start to get a semi-long exposure of the water, which gives it a nice flowy look at parts. I probably pushed it just a bit further than I should have at this time of day. Luckily, there was still plenty of information in the image that was retained. And the best part is that the darks of the cabin didn’t plug up and I could really work with how that cabin looks.
Last step
Let’s talk about giving your photo a look. Post-processing is like adding spices to a meal—people have different tastes and this is a lot about what makes your signature flavor, or look, in photography. Filter effects can look good, but are applied to every part of your image equally. In truly unique images, photographers are nearly always doing different things to different parts of the image in order to tell their story. And in my opinion, all photographers should add a solid end game to their workflow.
This is my set of spices for Crystal Mill—but your tastes may vary.
In getting wider with this shot, I introduce a lot of other elements into the image. So, to keep all those things from distracting the viewer from the hero of the shot, the mill, I applied both a small vignette, which darkened the outside of the image, as well as a significant amount of brightening up of the middle area. Here’s a before and after of just those adjustments:
This is the main way to bring attention to the mill while still allowing a good look at the surrounding areas.
The rest of the look is created using fairly straightforward adjustments, including adding a whole lot of contrast, boosting shadows, and keeping my highlights down.
In the final shot, the mill seems to sit front and center, more like a sculpture on the bow of a ship, coming forward big and proud. As a viewer, you get a larger sense of this edge that the mill sits on and the flow around it. A slightly different way to tell the story of Crystal Mill.
Are you ready to tell yours?
- Related Articles
- Latest Articles