This 48-hour cooler plan is made for creating real meals for your road trip food, not just random gas-station snacks.
Key takeaways:
- Treat your cooler like a battery for cold: charge it up (pre-chill) and give it plenty of ice.
- Stack it in layers: raw meat at the very bottom, meals and dairy in the middle, grab-and-go snacks on top.
- Think in days, not random snacks: simple breakfasts, one-hand lunches, and “cold-but-tasty” dinners.
Further reading...


How This 48-hour Cooler Plan Works
You don’t need a camper van or fancy gear to eat good road trip food on the road. For a 2-day drive, one decent cooler and this guide can cover every meal, all without mystery smells or soggy sandwiches.
It’s built around one main cooler (and a backup if you have room), and shows you how to pack it so your food stays cold and safe to eat the whole way.
With the cooler plan, you’ll be able to:
- Make your cooler stay cold longer
- Pack it in safe, non-gross layers
- Build food that still tastes good on Day 2
- Follow an easy 2-day menu
- Set things up so the cooler is easy to live with in a cramped car
Step 1: Make Your Cooler Work Harder
Think of your cooler as a thermos, not a fridge. It can’t make things cold, it only hangs onto the cold you give it.
Pre-chill the Cooler
On the night before your trip:
- Get the cooler out of the hot garage or storage
- Toss in a bag of ice or a few frozen water bottles
- Let it sit overnight, then dump that “starter ice” and refill with fresh ice when you’re ready to pack
Now your ice is working on your road trip food, not the warm plastic walls.
Mix Big Ice and Little Ice
- Block ice or frozen jugs on the bottom = the “anchor” that stays cold the longest
- Loose cubes and ice packs around your containers = fills air gaps and cools things faster
For hot-weather trips, a rough rule: pack about twice as much ice as food by space.
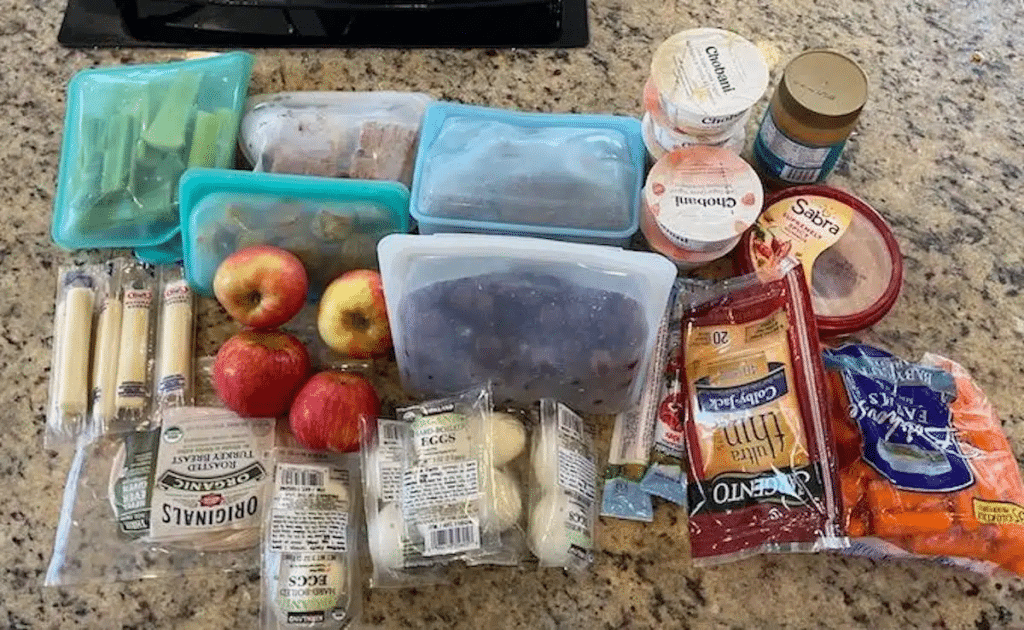
Start with Cold Road Trip Food
Try not to toss room-temp stuff into the cooler; they’ll just eat your ice.
- Chill drinks, yogurt, and cut veggies in the fridge overnight
- Freeze some water bottles and juice boxes so they double as ice packs
- Freeze any raw meat you’re bringing so it thaws slowly over the next 1–2 days
Step 2: Pack for Safety (and less mess)
Warm, forgotten food + dirty hands = “I don’t feel so good” a few hours later. You don’t need to stress about every detail; just follow a couple of simple rules.
Know the “Danger Zone” (without doing math)
Bacteria love food that sits between 40°F and 140°F (4–60°C), also known as the “danger zone”.
Plain-language version:
- Don’t leave cold food out of the cooler for more than 2 hours
- If it’s really hot outside (around 90°F / 32°C or more), stick to 1 hour
Grab what you need, close the cooler, eat, then pop leftovers back in.
Build Cold “Floors” and “Ceilings”
You want raw stuff sealed up and low, and ready-to-eat stuff up high.
Pack in this order:
- Bottom layer (raw + frozen zone)
- Raw meat or seafood (if you’re bringing any)
- Double-bagged or in a leak-proof container
- On top of block ice or frozen jugs
- Middle layer (meal zone)
- Pre-cooked meals (pasta salad, roast chicken)
- Dairy (yogurt, cheese)
- Sealed drinks and juice boxes
- Top layer (snack zone)
- Washed whole fruit
- Sandwich fixings and jar salads
- Ready-to-eat snacks
This keeps any drips away from the stuff you’re eating straight out of the box.
Pick Low-Drama Road Trip Food
Some road trip foods are just safer to pick than others when planning for an RV road trip.
Easier options:
- Hard cheeses (cheddar, gouda) instead of super-soft cheese
- Cured meats (salami, pepperoni) instead of wet deli slices
- Whole fruits (apples, oranges, grapes) instead of big tubs of cut melon
- Store-bought mayo and dressings instead of homemade versions
Stuff to think twice about for 48 hours in a cooler:
- Huge tubs of homemade mayo-based salads (egg, tuna, potato)
- Cut melon if you can’t keep it super cold and eat it early
- Raw sprouts stuffed into sandwiches
Keep Hands From Ruining Your Snacks
Before friends or family dive into the cooler with gas station hands:
- Pass around a bottle of hand sanitizer
- Keep wipes and paper towels right next to the cooler for quick cleanups
Don’t think this is all about being fussy. It’s about not sharing one bad bug for the rest of the drive.
Step 3: Build Road Trip Food That Doesn’t Get Gross
The enemy: warm, wet, squished food. The fix: give water and sauce fewer ways to soak in, and build things that like being cold.
Anti-Soggy Bread Tricks
Use these every time you build a sandwich or wrap:
- Fat “shield” on the bread: Spread butter, cream cheese, mayo, or nut butter all the way to the edges on the inside of the bread. It makes a barrier so tomatoes and pickles can’t soak in as fast.
- Lettuce “raincoat”: Lay whole lettuce leaves between bread and anything wet. The lettuce takes the hit, not the bread.
DIY Sandwiches (for Day 2)
If soggy bread is your villain, just don’t build the sandwiches yet. Pack them as parts:
- Small box 1: wet toppings (tomatoes, pickles, sauces)
- Small box 2: bread or rolls, wrapped in paper or a bag
- Small box 3: meat, cheese, lettuce
At lunch, everyone builds their own in under a minute. The texture still feels “freshmade.”
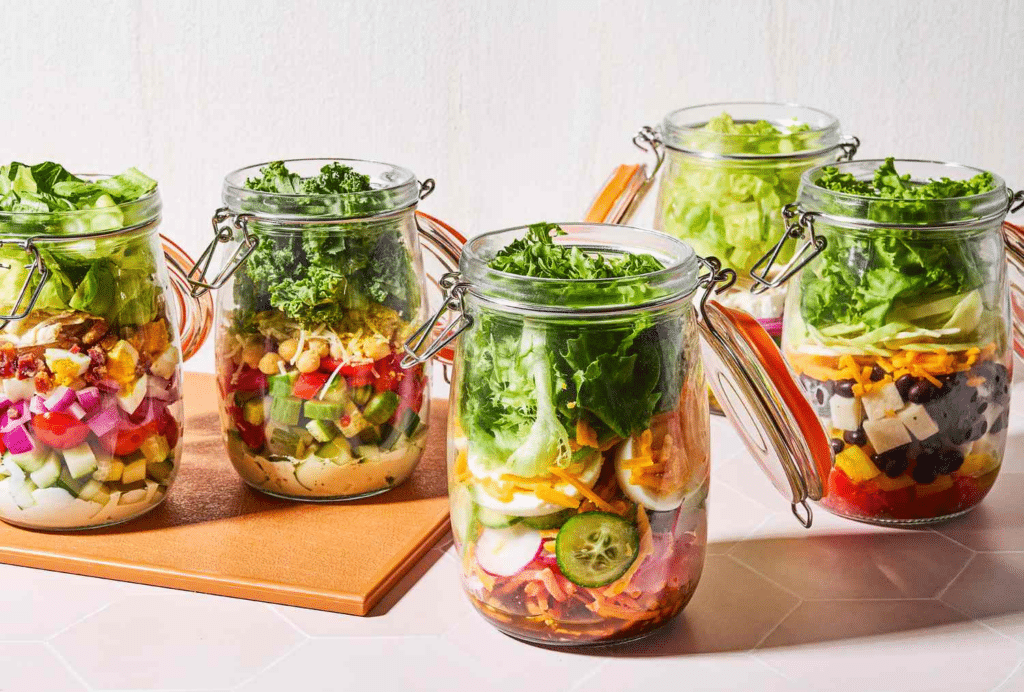
Jar Salads That Stay Crisp
Jar salads travel well and don’t mash in the cooler. The trick is the order.
Layer from bottom to top:
- Dressing
- Hard veggies (carrots, cucumbers, peppers)
- Beans, grains, or chopped chicken
- Greens, nuts, seeds, cheese
Keep them upright. When you’re ready to eat, flip, shake, and eat right from the jar.
Wraps That Keep it Together
For wraps:
- Make sure fillings are fully cooled before you roll them up. No warm chicken!
- Use hummus, cream cheese, or nut butter to “glue” the wrap together.
- Wrap the whole thing in parchment paper, then foil if you want. It lets a tiny bit of steam out so things don’t get soggy.
Step 4: A Simple 48-hour Road Trip Food Menu
Here’s a no-drama 2-day plan you can copy and tweak. It’s based on the original recipes and ideas, just translated out of “cookbook speak.”
Breakfast (both days): Jar and Snack Combos
Pick a couple of these:
- Overnight oats jars
- Oats + milk or plant milk + chia seeds + maple syrup or honey
- Frozen berries on top (they help keep it cold)
- Yogurt parfait “kits”
- Cooler: yogurt cups and berries
- Dry bag: granola in its own little bag so it stays crunchy
- Egg + fruit combo
- Hard-boiled eggs in a container
- Apples or oranges so you’re not sticky in the car
Lunch (Day 1 & 2): Easy, Not-Messy Mains
You want food that’s happy, cold and easy to eat once you park.
- Turkey “shield” sandwich
- Sturdy bread
- Cream cheese or butter on both slices
- Turkey, spinach, cheese, and a smear of mustard
- Greek jar salad
- Bottom: vinaigrette
- Then: cucumber and red onion
- Then: chickpeas and olives
- Top: feta and greens
- Hummus veggie wraps
- Tortilla spread with hummus
- Shredded carrots, peppers, greens
- Roll tight, cut in half, wrap in paper
Snacks: Things That Don’t Melt or Crumble
These keep you awake without giving you a sugar crash:
- Jerky
- Apples and pears (they travel better than bananas and don’t ripen everything else)
- Carrot and celery sticks in a jar with a bit of water
- Nuts and seeds (almonds, cashews, pumpkin seeds)
Keep snacks in a small bag or soft-sided cooler you can reach from the front seat.
Dinner (both nights): Cold but Actually Good
Night 1:
- Cold roast chicken
- Grab a rotisserie chicken earlier in the week, chill it, and pack cut pieces in a container
- Simple pasta salad
- Short pasta + olive oil or pesto + veggies + some cheese or salami
- It’s one of those foods that tastes better the next day anyway
Night 2:
- “Car charcuterie board”
- Salami or pepperoni
- Hard cheese
- Crackers
- Grapes or apple slices
- A handful of nuts
Spread it out on a picnic table, tailgate, or blanket. Zero cooking, lots of variety.
Step 5: Make the Cooler Easy to Live With
The cooler is going to be opened 400 times if you allow it. A few small tweaks save your ice and your sanity.
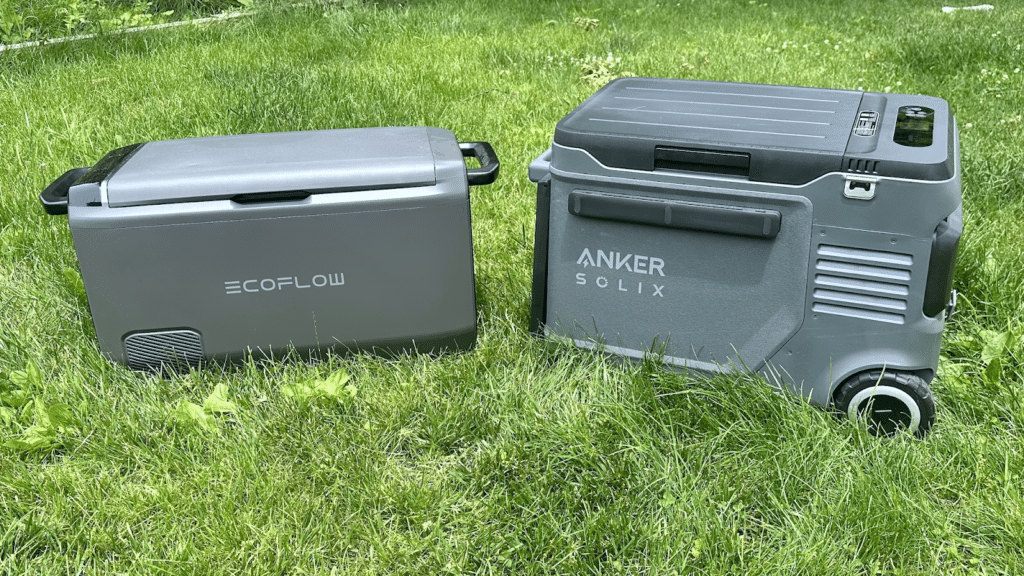
- If you can, use two coolers
- Cooler #1: “High-traffic” stuff (drinks, snacks)
- Cooler #2: “Don’t touch unless we’re eating” (meals, meat, dairy)
- Use clear, leak-proof containers
- So you can see what’s in there
- So meltwater can’t sneak in and soak everything
- Frozen sponge hack
- Wet a sponge, stick it in a zip bag, freeze it
- Works as a small ice pack, then becomes a dish cloth as it thaws
Frequently Asked Questions
Pre-chill the cooler, use block and cube ice together, and pack only pre-chilled or frozen food. Keep it closed as much as possible.
Layer it: raw meat on the bottom, meals and dairy in the middle, and grab-and-go snacks on top. Use leak-proof containers and keep everything sealed.
Hard cheeses, cured meats, jar salads, wraps, overnight oats, and sturdy fruits like apples and oranges hold up well and travel safely.
Use a “fat shield” (like butter or mayo) on bread, add a lettuce layer between wet ingredients, or pack sandwich parts separately to build fresh.
It’s safer to stick with store-bought mayo and dressings. Avoid large tubs of mayo-based salads unless you can keep them very cold and eat them early.
Two coolers are ideal: one for frequent-access snacks and drinks, another for meals and perishables you want to keep colder longer.
Turn Your Cooler Plan into Part of the Trip
Once you know what road trip food you’re bringing, plug it into your actual itinerary:
- Map the stops: Add grocery stores and picnic spots directly to your Roadtrippers map.
- Check the timeline: Look at the app’s “Day 1” vs. “Day 2” breakdown so you know to pack Day 2’s food deeper in the cooler.
- Save the list: Keep your grocery list in your trip notes (or favorite notes app) so you can reuse the template next time.
Ready to try this in real life? Drop your route into Roadtrippers to let the app handle the timing. You’ll know exactly when it’s breakfast-jar time and where to restock ice before it all melts. One saved trip = an easy template for your next 48-hour drive.
Meet the Author